Love this? Pin it for later! 📌
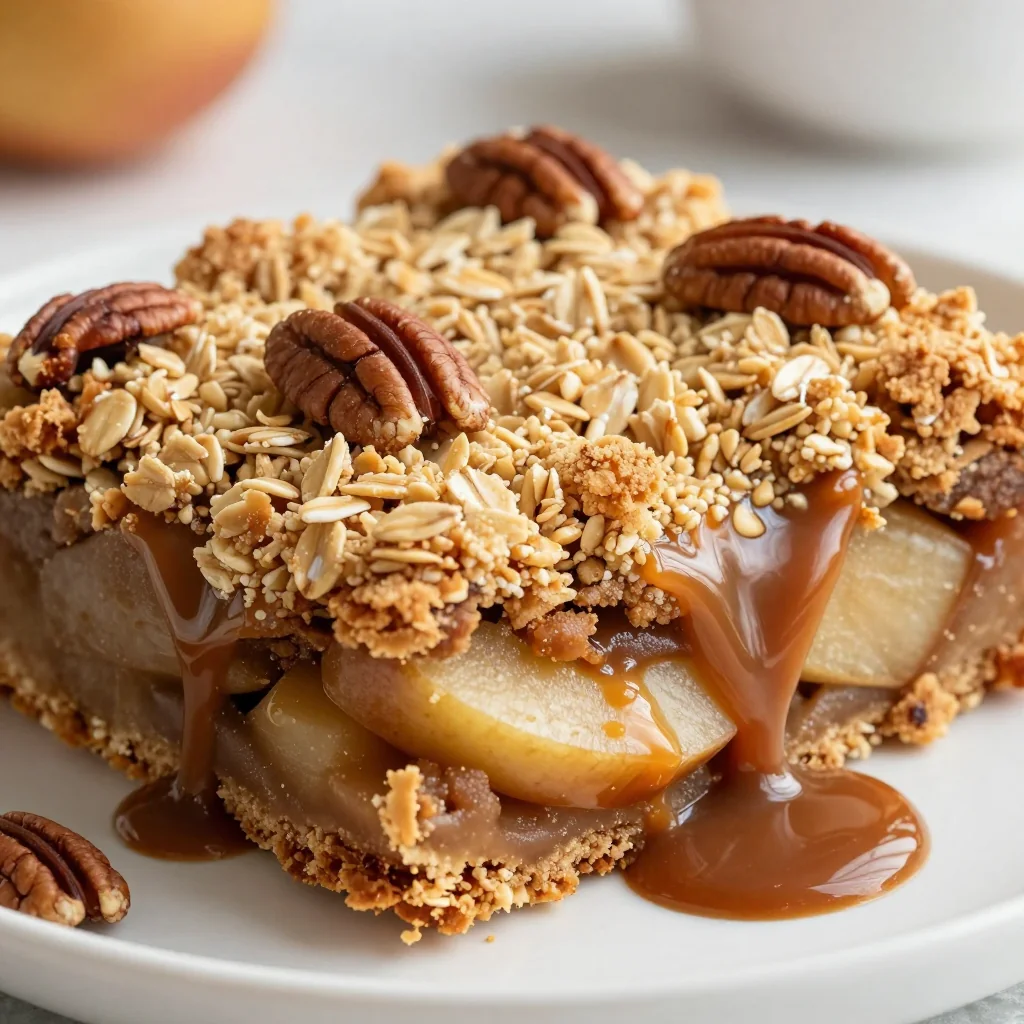
When the first snowflake drifts past my kitchen window, I know it's time to transform the season's most beloved flavors into something truly extraordinary. These Indulgent Salted Caramel Apple Pie Bars aren't just another dessert—they're a warm embrace on a cold winter evening, a sophisticated twist on the classic apple pie that will make your taste buds sing with joy.
I created this recipe during a particularly brutal February when the world outside felt gray and lifeless. I needed something that would capture the essence of comfort food while elevating it to dinner-party-worthy status. After three weeks of testing (and happily eating my way through multiple batches), I finally achieved the perfect balance: a buttery shortbread crust that holds its shape beautifully, tender apples kissed with warm spices, and that glorious salted caramel that pools in all the right places.
What makes these bars truly special is how they manage to be both rustic and refined. They're the kind of dessert that looks effortlessly elegant when arranged on a vintage cake stand, yet they're sturdy enough to pack for a winter picnic or ship to a loved one across the country. The combination of textures—the crisp shortbread base, the jammy apple filling, and that glossy caramel top—creates a sensory experience that will have everyone asking for the recipe.
Why This Recipe Works
- Perfect Texture Balance: The shortbread crust stays crisp even under the moist apple filling, thanks to a light pre-bake and cornstarch in the filling.
- Make-Ahead Friendly: These bars actually improve in flavor overnight, making them perfect for entertaining.
- Restaurant-Quality Caramel: The salted caramel sauce uses the dry caramel method for deeper flavor and perfect consistency.
- Winter Apple Solution: Even when apples aren't at their peak, the caramel and spices create incredible depth of flavor.
- Clean Slices Guaranteed: Chilling the bars before cutting ensures picture-perfect portions every time.
- Customizable Sweetness: Adjust the salt in the caramel to balance sweetness or add a pinch of flaky salt on top for contrast.
Ingredients You'll Need
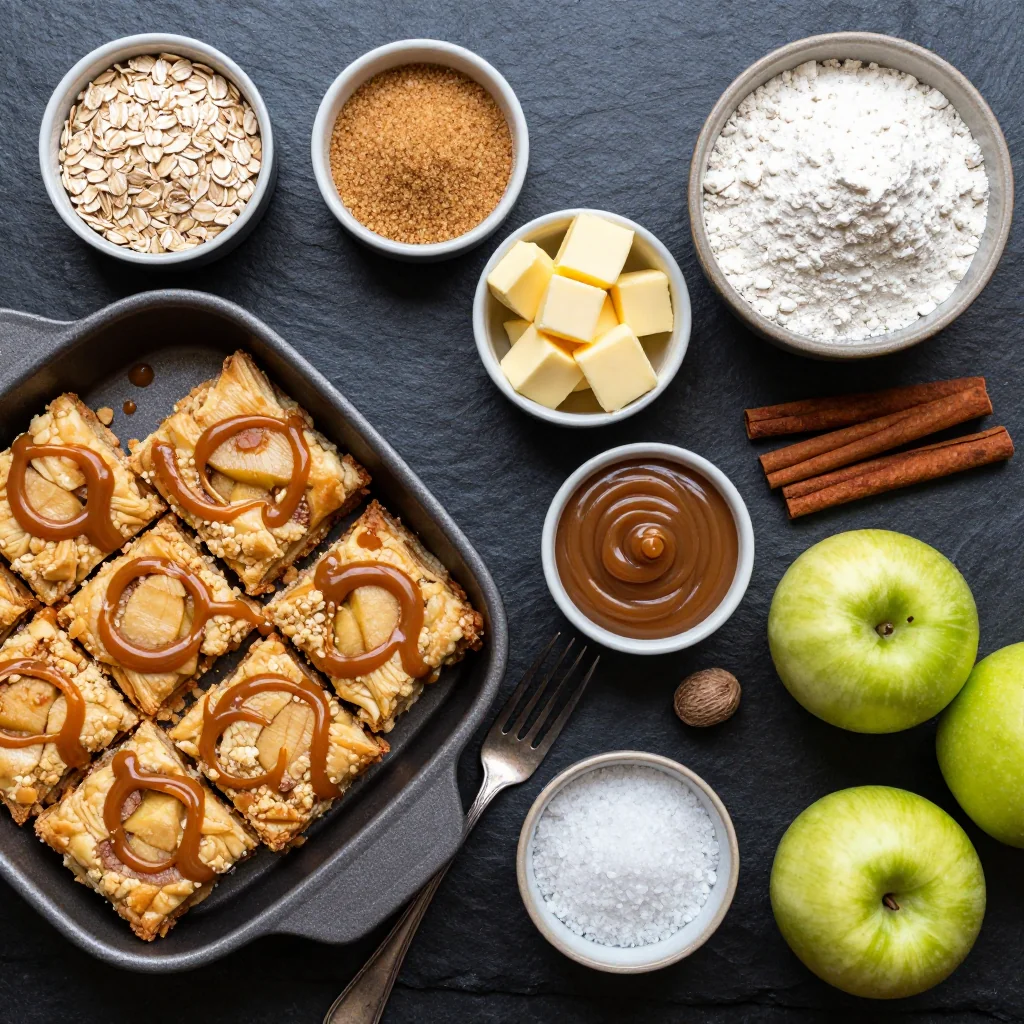
Quality ingredients make all the difference in this recipe. Let's break down what you'll need and why each component matters:
For the Buttery Shortbread Crust:
Unsalted Butter (1 cup/226g): Use European-style butter with higher fat content for the richest flavor. It should be cold but pliable—leave it on the counter for 20 minutes before starting. If you're in a pinch, regular butter works, but avoid margarine or spreads.
All-Purpose Flour (2 cups/250g): I prefer unbleached flour for its slightly nutty flavor. Measure by spooning flour into your cup and leveling with a knife for accuracy. Too much flour creates a tough crust.
Powdered Sugar (1/3 cup/40g): The cornstarch in powdered sugar helps create that tender, melt-in-your-mouth texture. Don't substitute with granulated sugar here.
For the Apple Filling:
Apples (4 medium, about 2 lbs): A mix of varieties creates the best flavor. I use 2 Granny Smith for tartness and 2 Honeycrisp or Fuji for sweetness. Avoid Red Delicious—they turn mushy. The apples should feel firm and heavy for their size.
Dark Brown Sugar (1/2 cup packed): The molasses in brown sugar complements the caramel beautifully. Light brown works too, but dark gives deeper flavor.
Ground Spices: Freshly ground is always best, but pre-ground works. I use a blend of cinnamon (2 tsp), nutmeg (1/2 tsp), and cardamom (1/4 tsp) for warmth. The cardamom is optional but adds sophistication.
For the Salted Caramel:
Granulated Sugar (1 cup/200g): Pure cane sugar gives the cleanest flavor. Avoid organic or raw sugars—they contain impurities that can crystallize.
Heavy Cream (3/4 cup): Must be at room temperature to prevent the caramel from seizing. Full-fat is essential; no substitutions.
Fleur de Sel or Maldon Salt (1 tsp): These finishing salts have delicate flakes that dissolve on your tongue. Regular table salt works but use half the amount.
How to Make Indulgent Salted Caramel Apple Pie Bars for Winter
Prepare Your Pan and Prep Ingredients
Line a 9x13-inch baking pan with parchment paper, leaving overhang on the sides to create handles for easy removal. This is crucial for clean cuts later. Take your butter out of the fridge to soften slightly—about 20 minutes should do it. While waiting, measure out all your ingredients and have them ready. This mise en place approach prevents caramel disasters and ensures smooth execution.
Make the Shortbread Crust
In your food processor, pulse together flour, powdered sugar, and salt. Add cold butter cubes and pulse until the mixture resembles coarse breadcrumbs—about 10-12 pulses. Don't overprocess! You want visible butter pieces for flakiness. Press the mixture firmly and evenly into your prepared pan. Use the bottom of a measuring cup to create a compact, level surface. Prick all over with a fork to prevent bubbling, then chill for 30 minutes while you preheat the oven to 350°F (175°C).
Par-Bake the Crust
Bake the chilled crust for 18-20 minutes until just set and barely golden around the edges. It will look underbaked—that's perfect! This par-baking step creates a moisture barrier that keeps the crust crisp under the apple filling. While it's baking, you can start peeling and slicing your apples. Aim for 1/4-inch slices for the ideal texture—thin enough to cook through but thick enough to maintain some bite.
Create the Apple Filling
In a large bowl, toss apple slices with brown sugar, spices, cornstarch, lemon juice, and vanilla. Let this mixture sit for 10 minutes—this draws out some apple juices, creating a natural sauce that prevents a watery filling. The cornstarch will thicken these juices as they bake. Stir gently to avoid breaking the apple slices. The mixture should look glossy and well-coated.
Assemble and Initial Bake
Arrange the apple mixture evenly over the par-baked crust, pressing down gently to compact. Pour any juices from the bowl over the top. Bake at 350°F (175°C) for 25 minutes. The apples should be tender but not mushy, and the juices should be bubbling thickly around the edges. This initial bake cooks the apples before adding the caramel, preventing it from becoming too thin.
Master the Salted Caramel
Here's where the magic happens. In a heavy-bottomed saucepan, spread sugar in an even layer over medium heat. Resist the urge to stir! Instead, gently swirl the pan as the sugar begins to melt and caramelize. Once you have a deep amber color (about 8-10 minutes), immediately remove from heat and whisk in butter until melted. Carefully pour in warm cream—it will bubble vigorously! Return to low heat and whisk until smooth. Stir in salt and let cool for 5 minutes.
Final Assembly and Bake
Pour the slightly cooled caramel over the partially-baked apples, using a spatula to distribute evenly. The caramel will seep between the apple slices, creating gorgeous layers. Return to the oven for 12-15 minutes more, until the caramel is bubbling gently and has thickened to a honey-like consistency. The top should be glossy and temptingly golden.
Cool and Set
This is crucial: let the bars cool completely at room temperature for at least 2 hours, then refrigerate for 4 hours or overnight. The caramel needs time to set properly. Warm caramel will run everywhere and make cutting impossible. Patience pays off here—I promise it's worth the wait! The flavors actually meld and improve overnight.
Cut and Serve
Using the parchment paper handles, lift the entire slab from the pan. For clean cuts, use a sharp knife dipped in hot water, wiping between cuts. Cut into 24 squares for a crowd, or 16 larger bars for dessert portions. The bars hold their shape beautifully but are best served slightly chilled. Bring to room temperature for 15 minutes before serving for the best flavor and texture.
Expert Tips
Temperature Matters
Use a candy thermometer for the caramel if you're nervous. Aim for 350°F (175°C) for perfect consistency. Too hot and it becomes bitter; too cool and it's grainy.
Prevent Crystallization
Make-Ahead Magic
These bars taste even better on day two! Store covered in the fridge for up to 5 days. The flavors meld beautifully, making them perfect for entertaining.
Freezing Success
Freeze individual bars wrapped in plastic wrap for up to 3 months. Thaw overnight in the fridge. The texture remains perfect—no soggy bottoms!
Variations to Try
Pear & Ginger Twist
Replace half the apples with ripe pears and add 1 tbsp fresh grated ginger to the filling. The combination is incredibly aromatic and perfect for holiday gatherings.
Bourbon Pecan Upgrade
Add 2 tbsp bourbon to the caramel and sprinkle 1/2 cup toasted pecans over the apples before adding the caramel. The bourbon adds incredible depth.
Salted Maple Version
Replace the caramel with pure maple syrup reduced to 1 cup with 2 tbsp butter and 1/2 tsp salt. It's a New England twist that's absolutely divine.
Storage Tips
These bars are incredibly storage-friendly, which makes them perfect for holiday baking marathons. Here's everything you need to know:
Refrigerator Storage:
Store cut bars in an airtight container with parchment paper between layers. They'll keep for up to 5 days, though they're best within the first 3 days. The crust stays remarkably crisp thanks to the butter content. Let them sit at room temperature for 15-20 minutes before serving for the best texture.
Freezing Instructions:
These bars freeze beautifully! Cut into portions and wrap each bar tightly in plastic wrap, then place in a freezer bag. Freeze for up to 3 months. To serve, unwrap and thaw overnight in the refrigerator, then let come to room temperature for 30 minutes. The caramel might weep slightly upon thawing—just blot gently with a paper towel.
Make-Ahead Strategy:
You can make these bars up to 3 days ahead of serving. In fact, I recommend it! The flavors meld and intensify over time. Just keep them refrigerated and bring to room temperature before serving. If you're taking them to an event, transport them chilled in a cooler with ice packs.
Frequently Asked Questions
Crystallization happens when sugar crystals find something to cling to. Prevent this by:
- Using a clean pan with no residue
- Avoiding stirring once the sugar begins melting
- Brushing down the pan sides with water if crystals form
- Adding a tablespoon of corn syrup to the sugar (helps prevent crystallization)
If crystallization occurs, you can sometimes save it by adding 2 tablespoons water and stirring over low heat until dissolved, then restarting the caramelization process.
While homemade caramel is worth the effort, you can substitute in a pinch. Use 1 cup of high-quality store-bought caramel sauce (not ice cream topping) and heat it with 2 tablespoons butter and 1/2 teaspoon salt. The flavor won't be as complex, but it works. Avoid caramel dips or sauces with added corn syrup as they'll be too sweet and runny.
A soggy crust usually means the par-bake wasn't long enough or the filling was too wet. Ensure you:
- Par-bake until the crust is just beginning to brown
- Let the apple mixture sit to draw out juices before assembling
- Don't skip the cornstarch in the filling
- Cool completely before refrigerating
If your kitchen is very humid, you can brush the par-baked crust with a lightly beaten egg white and return to the oven for 2 minutes to create a moisture barrier.
Yes! Substitute the all-purpose flour with a 1:1 gluten-free baking blend that contains xanthan gum. I recommend King Arthur or Bob's Red Mill brands. Add an extra 2 tablespoons of butter to the crust to combat the dryness that gluten-free flours can sometimes have. The rest of the recipe is naturally gluten-free.
Perfect cuts require patience and the right technique:
- Chill the bars thoroughly (at least 4 hours)
- Use a sharp chef's knife, not a serrated one
- Dip the knife in hot water and wipe dry between cuts
- Score the top first, then press down in one smooth motion
- Clean the knife after every cut
For special occasions, trim the edges for a professional look, though I personally love the rustic edges for home baking.
Absolutely! Halve all ingredients and use an 8x8-inch pan. The baking times remain roughly the same, though start checking 2-3 minutes earlier at each stage. The caramel recipe halves perfectly, but you might want to make the full amount—it's delicious over ice cream or stirred into coffee. When halving, be extra careful with the caramel as smaller amounts cook faster and can burn quickly.
Indulgent Salted Caramel Apple Pie Bars for Winter
Ingredients
Instructions
- Prepare the pan: Line a 9x13-inch pan with parchment paper, leaving overhang for handles. Preheat oven to 350°F (175°C).
- Make the crust: In a food processor, pulse flour, powdered sugar, and salt. Add cold butter and pulse until mixture resembles coarse crumbs. Press firmly into prepared pan. Chill 30 minutes, then bake 18-20 minutes until just set.
- Prepare apples: While crust bakes, peel and slice apples 1/4-inch thick. Toss with brown sugar, spices, cornstarch, lemon juice, and vanilla. Let sit 10 minutes.
- First bake: Arrange apples over par-baked crust. Bake 25 minutes until apples are tender.
- Make caramel: In a heavy saucepan, melt sugar over medium heat without stirring, swirling pan occasionally, until deep amber. Remove from heat, whisk in butter, then cream. Stir in salt.
- Final bake: Pour caramel over apples. Return to oven for 12-15 minutes until caramel is bubbling.
- Cool completely: Let cool 2 hours at room temperature, then refrigerate 4 hours or overnight.
- Serve: Use parchment handles to lift from pan. Cut with a hot, sharp knife. Enjoy chilled or at room temperature.
Recipe Notes
For best results, use a mix of apple varieties. Granny Smith provides tartness while Honeycrisp or Fuji add sweetness. The bars improve in flavor overnight, making them perfect for entertaining. Store covered in the refrigerator for up to 5 days.