Funnel Cake Apple Fries are the kind of culinary rebellion that turns a simple snack into a showstopper. Picture a Saturday morning, the kitchen buzzing with the clatter of pans, and a friend daring you to beat the classic funnel cake at home. The moment the batter hits the hot oil, a golden hiss announces that the ordinary is about to be elevated. I was skeptical, but the first bite—crispy on the outside, sweet apple on the inside—made me promise myself to share every trick. The secret lies not in the batter alone but in the way the apples are treated before they meet the oil. If you think you’ve seen every version, think again. Let me walk you through every single step—by the end, you’ll wonder how you ever made it any other way.
The first thing that struck me was the aroma: a caramelized sweetness that drifted through the kitchen like a warm hug. The sound of the apples sliding into the oil was a satisfying splash, a promise of crunch. Visually, the batter glides into the pan, forming a delicate lace that turns into a golden web. The texture, once cooled, feels like a crisp blanket over tender apple sticks. The taste is a balance of buttery batter, cinnamon‑kissed apples, and a dusting of powdered sugar that melts into a subtle glaze. The experience is so vivid that even the memory of the first bite lingers like a favorite song.
I’ve tried dozens of funnel cake recipes, from the airy, airy versions to the dense, doughy ones, yet none matched the harmony of this apple‑infused twist. The batter’s lightness is matched by the apple’s juiciness, creating a contrast that feels like a dance between sweet and savory. Most recipes get this completely wrong by over‑baking the batter or under‑seasoning the apples, resulting in a bland, greasy mess. Here, the batter is just thick enough to hold the apple sticks, and the apples are seasoned with cinnamon before they hit the oil, ensuring every bite is a burst of flavor. The result is a snack that feels indulgent yet surprisingly balanced, with a crunch that satisfies without overwhelming your palate.
I dare you to taste this and not go back for seconds. The first bite will have you reaching for the next, and the second will leave you wondering why you ever settled for plain funnel cake. I’ll be honest—I ate half the batch before anyone else got to try it. Most recipes get this completely wrong, but the secret lies in the batter’s consistency and the apple’s seasoning. Picture yourself pulling this out of the pan, the whole kitchen smelling incredible, and the anticipation of that first crunch. If you’ve ever struggled with making funnel cake crispy, you’re not alone—and I’ve got the fix.
What Makes This Version Stand Out
- Taste: The subtle sweetness of apples balances the buttery batter, creating a flavor profile that feels both nostalgic and fresh.
- Texture: A crisp exterior with a tender, juicy interior turns every bite into a satisfying crunch.
- Simultaneous Cooking: Baking the apples first and then frying them with the batter saves time and ensures even cooking.
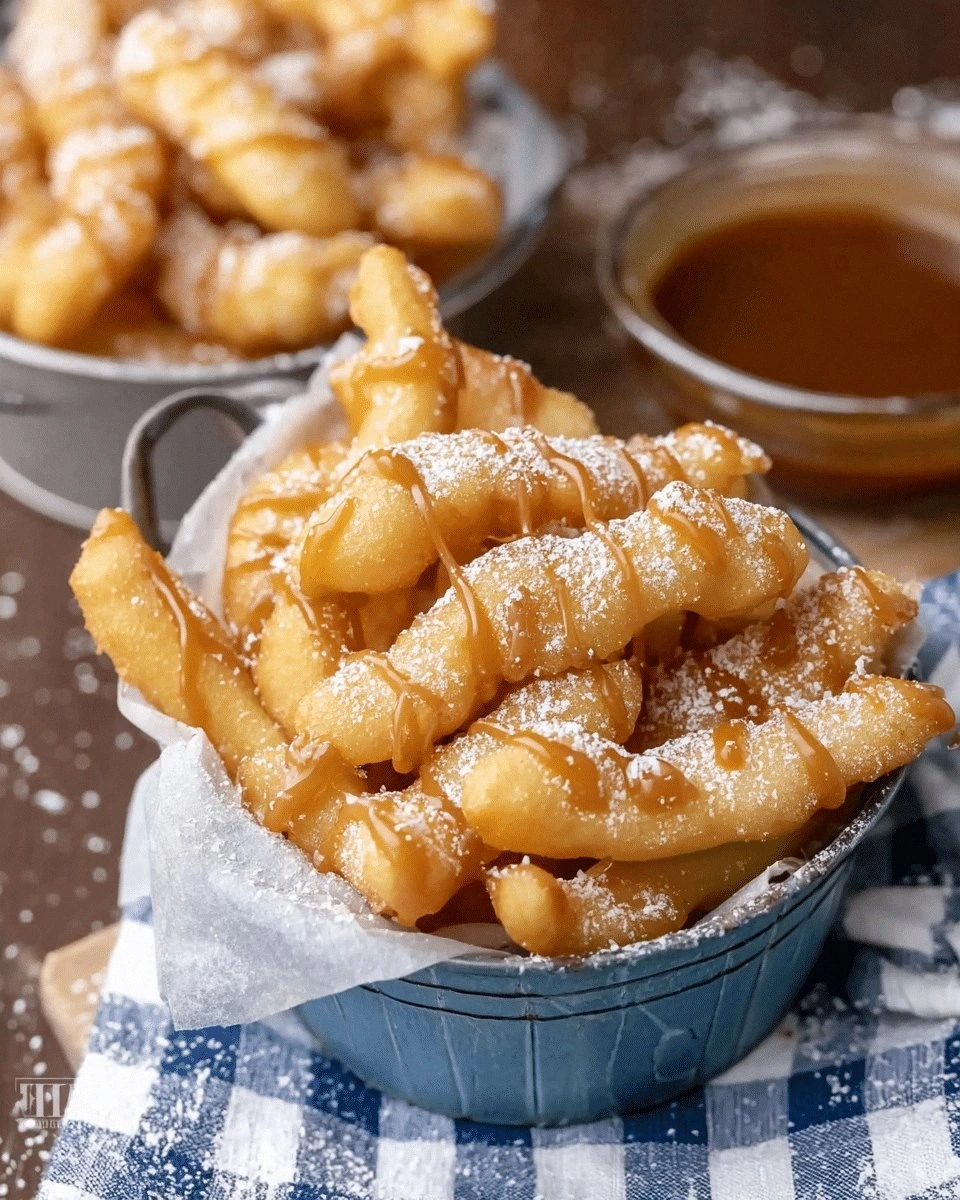
- Visual Appeal: The golden lattice of the funnel cake paired with the bright orange of the apples looks almost too good to eat.
- Versatility: This recipe can be served as a dessert, a snack, or even a sweet breakfast option.
- Ingredient Quality: Using fresh, seasonal apples and high‑grade butter elevates the entire dish.
- Make‑Ahead Potential:
Inside the Ingredient List
The Flavor Base
The foundation of any great funnel cake is its batter, and this recipe uses a simple yet powerful combination of flour, baking powder, salt, sugar, milk, egg, butter, and vanilla. Each component plays a crucial role: the baking powder ensures lift, the sugar adds sweetness, and the vanilla infuses depth. Skipping any of these would result in a flat, unremarkable cake. If you’re in a hurry, you can use instant dry mix, but the homemade batter offers a richer taste. For the best flavor, choose an all‑purpose flour with a protein content around 10-12%.
The Texture Crew
The texture of the final dish hinges on the ratio of wet to dry ingredients and the temperature of the oil. A slightly thicker batter clings to the apple sticks, forming a crisp shell. The oil should be hot enough to sizzle immediately but not so hot that it burns the exterior before the interior cooks. A thermometer set at 350°F (175°C) is ideal. If you notice the batter pooling instead of forming a lattice, reduce the amount of flour or increase the milk by a tablespoon. Consistency is key; a batter that is too thin will spread and lose its structure.
The Unexpected Star
Apples are the unexpected star that sets this recipe apart. They are peeled, cored, and sliced into sticks before being seasoned with cinnamon. The cinnamon not only adds warmth but also helps caramelize the apple surface. If you prefer a less sweet version, use a tart apple like Granny Smith, which balances the buttery batter. A pinch of nutmeg can also be added for an extra layer of complexity. The apple’s natural sugars become caramelized when fried, creating a glaze that coats each bite.
The Final Flourish
The final flourish is a dusting of powdered sugar that melts into a subtle glaze over the warm batter. The sugar adds a gentle sweetness that doesn’t overpower the apple’s flavor. For a richer finish, drizzle a small amount of maple syrup or caramel sauce. This step transforms the dish from a simple snack into a decadent treat. The powdered sugar also provides a slight crunch that complements the crisp exterior. Remember to dust immediately after frying to keep the sugar from settling.
Everything's prepped? Good. Let's get into the real action and bring this dish to life.
The Method — Step by Step
- In a medium bowl, whisk together 2 cups flour, 1 tablespoon baking powder, 1 teaspoon salt, and 2 tablespoons sugar until well combined. The dry mix ensures even distribution of leavening agents, which is essential for a light batter. Set aside while you prepare the wet ingredients. This step is your foundation; a good dry mix can make or break the texture. Keep this mixture in a separate bowl to avoid accidental mixing with wet ingredients.
- In another bowl, beat 1 cup milk, 1 egg, 2 tablespoons melted butter, and 1 teaspoon vanilla extract until the mixture is smooth. The butter adds richness, while the vanilla deepens the flavor profile. Whisk until the egg is fully incorporated; this ensures a consistent batter. The mixture should be slightly runny, not a thick paste. If it’s too thick, add a tablespoon of milk to loosen it.
- Pour the wet ingredients into the dry mixture, stirring gently until just combined. Be careful not to over‑mix; a few lumps are acceptable. Over‑mixing can activate gluten, making the cake tough. The batter should be pourable but not runny. The moment you see a light, silky consistency, you’re ready to move on. This is where the batter starts to develop its character.
- Heat 1 cup vegetable oil in a deep skillet over medium‑high heat until it reaches 350°F (175°C). A drop of batter should sizzle and rise to the surface immediately. Use a thermometer for accuracy; this temperature ensures a crisp exterior while keeping the interior tender. If the oil is too hot, the batter will burn; too cool, and it will absorb oil and become greasy. Keep the heat steady throughout the frying process.
- While the oil heats, toss 4 medium apples (peeled, cored, sliced into sticks) in a bowl with 1 teaspoon ground cinnamon and 1 tablespoon butter. The butter melts and coats the apples, creating a caramelized layer when fried. The cinnamon adds warmth and complements the apple’s sweetness. Mix until every stick is evenly coated. This step is crucial for flavor; a dry apple will not caramelize properly.
- Using a funnel, pour a small amount of batter onto the hot oil, allowing it to cascade into a delicate lattice around the apple sticks. The batter should spread slowly, forming a fine web that adheres to the apples. This technique creates a beautiful visual and ensures even cooking. If the batter spreads too quickly, reduce the amount poured or lower the heat slightly. The goal is a crisp, golden web that holds the apple sticks together.
- Let the batter cook for 3–4 minutes, or until the edges pull away from the pan and the batter is golden brown. The apple sticks inside should be tender and slightly caramelized. Flip the entire assembly carefully using tongs; the batter should remain intact. Cook the other side for an additional 2–3 minutes. The final result should be a golden lattice with a crisp exterior and a tender, caramelized apple interior.
- Remove the fried apple sticks from the oil and place them on a paper towel-lined plate to drain excess oil. While still hot, dust generously with powdered sugar, allowing it to settle into the batter’s crevices. The sugar adds a sweet finish that melts into a subtle glaze. Serve immediately while the batter is warm and the sugar is still slightly crunchy. The aroma will be irresistible, drawing everyone to the table.
- Optionally, drizzle a small amount of maple syrup or caramel sauce over the finished dish for an extra layer of decadence. This adds a glossy sheen and a deep, sweet flavor that pairs beautifully with the cinnamon. For a healthier twist, use a light honey drizzle instead. The sauce should be poured gently to avoid soaking the batter. Serve alongside a scoop of vanilla ice cream or a dollop of whipped cream for a complete dessert experience.
That's it — you did it. But hold on, I've got a few more tricks that'll take this to another level. The next section will reveal insider tricks that ensure every batch turns out flawless, no matter your experience level.
Insider Tricks for Flawless Results
The Temperature Rule Nobody Follows
Many home cooks overlook the importance of oil temperature, resulting in greasy, soggy batter. Use a thermometer to monitor the oil at 350°F (175°C). If the temperature dips, let the oil reheat before adding more batter. This ensures a crisp exterior and a tender interior. A stable temperature also prevents the batter from absorbing too much oil, keeping the dish light.
Why Your Nose Knows Best
Your sense of smell is the best indicator that the batter has reached the ideal golden stage. When the batter hits the oil, you’ll hear a distinct sizzle that signals the beginning of caramelization. The aroma of butter, sugar, and cinnamon will fill the kitchen, telling you that the batter is ready to be poured. Trust that scent; it’s a reliable cue that the batter is neither under‑cooked nor over‑cooked.
The 5-Minute Rest That Changes Everything
After frying, let the apple sticks rest on a wire rack for five minutes before dusting with sugar. This brief rest allows the steam to escape, preventing the batter from becoming soggy. It also gives the sugar a chance to set into a light glaze. A quick rest is a small step that makes a noticeable difference in texture. The result is a crisp exterior that holds up even as the apple inside continues to soften.
The Secret to Even Caramelization
When frying the apples, flip them halfway through to ensure even caramelization on all sides. The butter coating helps the apples brown evenly, creating a uniform glaze. If you notice one side is browning faster, reduce the heat slightly or rotate the pan. Even caramelization ensures that every bite delivers the same sweet, buttery flavor.
The Power of a Good Funnel
A high‑quality funnel is essential for creating a fine, even lattice. A cheap funnel may clog or produce uneven strands. Choose a funnel with a wide opening and a sturdy handle for better control. A good funnel allows you to pour the batter with precision, resulting in a beautiful, delicate pattern that holds the apple sticks together.
The Final Touch: A Light Dusting
Dusting the finished dish with powdered sugar should be done while the batter is still hot. The sugar melts slightly, forming a subtle glaze that clings to the batter’s crevices. Too much sugar can make the dish overly sweet, so use just enough to create a light coating. The sugar also adds a gentle crunch that complements the crisp exterior. This final touch transforms the dish from simple to spectacular.
Creative Twists and Variations
This recipe is a playground. Here are some of my favorite ways to switch things up:
Cinnamon‑Honey Glaze
Replace powdered sugar with a drizzle of honey and a sprinkle of cinnamon for a sticky, sweet glaze that pairs beautifully with the apple's natural tartness. The honey caramelizes slightly, adding a deep golden hue. This variation works well for a brunch or a light dessert.
Chocolate‑Covered Apple Fries
After frying, dip the apple sticks in melted dark chocolate and let them set on parchment paper. The chocolate coating creates a rich, indulgent bite that pairs well with a splash of sea salt. This twist turns the dish into a dessert‑style treat perfect for parties.
Spiced Apple Fries with Nutmeg
Add a pinch of nutmeg to the cinnamon when seasoning the apples for a warm, aromatic flavor that’s reminiscent of holiday desserts. The nutmeg’s earthy undertones complement the apple’s sweetness. This variation is especially delightful during the fall season.
Apple‑Cheese Fusion
Incorporate shredded sharp cheddar into the batter, creating a savory layer that contrasts with the sweet apple. The cheese melts into a gooey center, adding a rich, umami depth. This savory version is great for a snack or an appetizer at a gathering.
Maple‑Infused Batter
Replace half of the milk with maple syrup to infuse the batter with a natural sweetness and a subtle maple flavor. The syrup also adds a slight caramel color to the batter. This variation enhances the overall sweetness without overpowering the apple.
Vegan Version
Use a plant‑based milk, flaxseed egg, and vegan butter to create a completely vegan version. The batter remains light and airy, and the vegan butter adds richness. This version is perfect for those who prefer plant‑based ingredients.
Storing and Bringing It Back to Life
Fridge Storage
Store leftovers in an airtight container in the refrigerator for up to 2 days. The batter will firm up slightly, but a quick reheating will restore its crispness. When ready to serve, heat in a skillet over medium heat for 2–3 minutes to revive the crunch. This method preserves the texture without compromising flavor. Avoid microwaving, as it can make the batter soggy.
Freezer Friendly
Freezing is possible but not ideal, as the batter may lose its crispness. If you must freeze, wrap the apple sticks individually in parchment paper and place them in a freezer bag. Freeze for up to 1 week. When ready, thaw at room temperature for 15 minutes before reheating. This method helps maintain the batter’s structure as much as possible.
Best Reheating Method
The best way to reheat is in a preheated oven at 350°F (175°C) for 5–7 minutes. The oven’s dry heat restores the batter’s crispness while keeping the apple inside tender. Alternatively, use a skillet over medium heat for 2–3 minutes, flipping once. A tiny splash of water before reheating can help steam the batter back to its original texture. The result is a fresh, crispy dish that tastes like it was made just now.