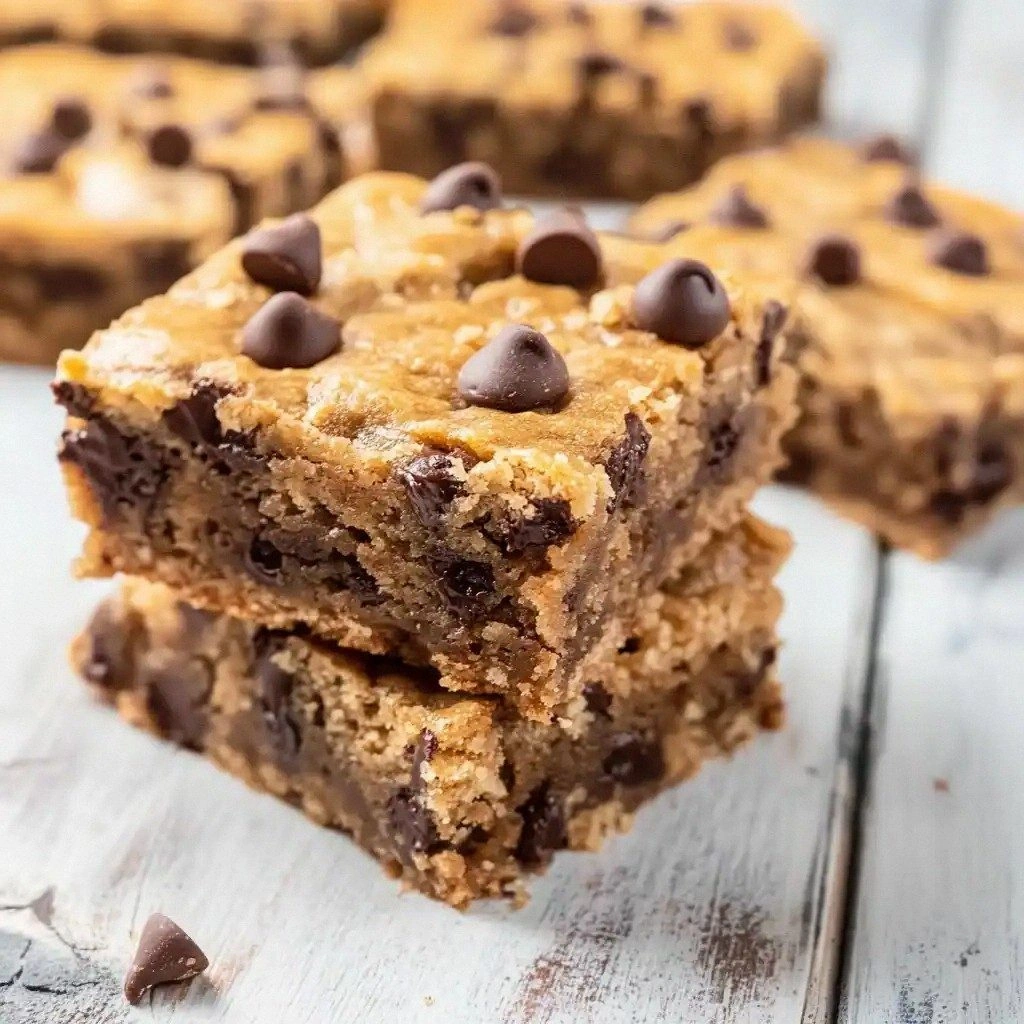
It all started on a rainy Saturday when I was scrolling through a recipe blog, hoping for a sweet fix that wouldn’t require a trip to the grocery store. I opened a page that promised “Easy Peanut Butter Chocolate C” and my eyes widened at the promise of a decadent treat that could be whipped up in the span of a single afternoon. The kitchen smelled of melted butter and cocoa, the air thick with the anticipation of something indulgent. I laughed at the irony—here I was, a self‑proclaimed foodie, about to make the simplest yet most irresistible bars anyone could imagine. The moment I saw that photo of glossy chocolate chips glistening on a golden crust, I knew I had to try it.
Picture this: the butter is already bubbling in a saucepan, a swirl of creamy peanut butter slowly dissolving into it, and the brown sugar’s caramel scent filling the room like a warm hug. The sound of the batter mixing is a satisfying hiss, a rhythmic drumbeat that tells me I’m on the right track. Each spoonful of batter that I spoon onto the pan feels like a promise of gooey, fudgy bliss. My fingertips tingling from the heat, I can almost taste the first bite—sweet, salty, and with a hint of nutty richness that lingers on the palate. That’s the kind of sensory experience that turns a simple recipe into a culinary adventure.
What makes this version stand out from every other peanut‑butter‑chocolate bar recipe out there is the meticulous balance of flavors and textures. The butter is melted to just the right consistency, giving the bars a silky mouthfeel that melts in your mouth rather than clumping. The chocolate chips are divided—half folded into the batter, half sprinkled on top—creating a crunchy, chocolatey crown that contrasts with the chewy interior. The addition of baking soda creates a subtle lift, ensuring the bars are not too dense but still retain that satisfying chew. And the secret? A dash of vanilla that elevates every bite, turning the humble mix into a gourmet delight.
But the real kicker is the unexpected twist of using a touch of sea salt on the top. It’s the small detail that turns sweet into savory, adding depth that lingers after the last crumb. I dare you to taste this and not go back for seconds—once you start, you’ll find yourself reaching for more. That’s the power of this recipe: a single batch that delivers a symphony of textures and flavors, all while remaining surprisingly simple. Stay with me here—this is worth it.
Let me walk you through every single step—by the end, you’ll wonder how you ever made it any other way.
What Makes This Version Stand Out
**Flavor Harmony:** The combination of creamy peanut butter, rich chocolate chips, and a subtle vanilla base creates a flavor profile that is both familiar and surprising. Each bite delivers a layered experience, starting with the nutty peanut butter, followed by a burst of chocolate, and finishing with a gentle vanilla aftertaste.
**Texture Contrast:** The batter’s consistency is thick enough to hold its shape yet light enough to melt in your mouth. The sprinkled chocolate chips on top add a satisfying crunch that breaks the soft interior, giving the bars a delightful textural interplay.
**Simplicity of Ingredients:** With only nine ingredients—most of which you likely already have in your pantry—this recipe eliminates the need for exotic or hard‑to‑find items. The straightforward list keeps the focus on flavor rather than complicated steps.
**Time Efficiency:** From prep to bake, the entire process takes just 45 minutes. The recipe’s streamlined steps mean you can have a fresh batch of bars ready to devour in under an hour.
**Make‑Ahead Potential:** These bars keep well at room temperature for a week, making them perfect for gifting or for a quick snack on the go. Their sturdy structure allows them to be stored in an airtight container without losing their deliciousness.
**Crowd‑Pleaser:** Whether you’re hosting a party or simply treating yourself, these bars are guaranteed to impress. Their rich flavor and satisfying texture make them a standout choice for any gathering.
**Ingredient Quality Matters:** The use of high‑quality peanut butter and semi‑sweet chocolate chips elevates the entire experience. The difference between good and great is often a matter of ingredient quality, and this recipe embraces that principle.
**Easy Adjustments:** The recipe scales beautifully, allowing you to adjust the number of servings without losing flavor balance. The ingredient list’s proportions remain consistent, ensuring a perfect outcome every time.
Alright, let's break down exactly what goes into this masterpiece...
Inside the Ingredient List
The Flavor Base
Unsalted butter and creamy peanut butter form the core of the flavor profile. The butter melts to create a silky medium that carries the peanut butter’s natural sweetness, while the peanut butter contributes a deep, nutty undertone that anchors the dish. If you skip the butter, the bars will be dry and lack the luxurious mouthfeel that makes them memorable. A small swap for a dairy‑free butter can be made if you prefer a vegan version, but be aware that the texture will shift slightly.
Brown sugar is the sweetener of choice, delivering a caramel note that complements the peanut butter. Unlike white sugar, brown sugar introduces molasses content, which adds depth and a hint of acidity that balances the richness. If you’re looking for a lower‑calorie option, you can experiment with a natural sweetener like date sugar, though the moisture content may differ.
Vanilla extract is the finishing touch that rounds out the flavors. Its warm, aromatic profile lifts the peanut butter and chocolate, creating a cohesive taste experience. A single teaspoon is enough; too much vanilla can overpower the other flavors and give the bars an overly sweet, syrupy finish.
The Texture Crew
All‑purpose flour provides structure and body. It helps the bars set without becoming cakey, giving them a firm yet tender crumb. If you’re gluten‑free, you can substitute a blend of rice flour and tapioca starch, but keep an eye on the moisture content.
Baking soda is the leavening agent that gives the bars a slight lift. It reacts with the acidic components, such as the brown sugar, to create tiny bubbles that keep the bars from being too dense. Without it, the bars would be heavy and chewy, lacking the lightness that makes them enjoyable.
Salt, though used in a quarter teaspoon, is crucial for flavor enhancement. It brings out the richness of the peanut butter and balances the sweetness, preventing the bars from tasting cloyingly sweet.
The Unexpected Star
Chocolate chips are the star attraction, offering both flavor and visual appeal. The recipe calls for 1½ cups, divided between the batter and the topping. The top layer of chips creates a glossy, slightly crunchy surface that contrasts with the chewy interior. If you’re a dark chocolate lover, you can substitute a portion of semi‑sweet chips with dark chocolate chips for a richer bite.
The Final Flourish
Eggs act as a binder, holding all the ingredients together. The yolks add richness, while the whites help the batter set. If you’re looking for a vegan version, you can replace the eggs with a flaxseed mixture (1 tablespoon ground flaxseed + 3 tablespoons water per egg) or a commercial egg replacer. The texture will differ slightly, but the bars will still hold together.
Everything's prepped? Good. Let's get into the real action...
The Method — Step by Step
- Preheat your oven to 350°F (175°C) and line a 9x13 inch baking pan with parchment paper. The parchment prevents sticking and makes cleanup a breeze. Place the pan on the middle rack to ensure even heat distribution. This step is crucial for a uniform bake, so don’t skip the preheating.
- In a medium saucepan, melt the butter over low heat until it turns a light amber color. Stir continuously to avoid scorching. The butter’s golden hue signals that it’s ready for the next step. A slight caramelization adds depth to the final flavor.
- Add the creamy peanut butter to the melted butter and stir until fully blended. The mixture should be smooth and glossy, like a velvety sauce. This is the moment where the peanut butter’s natural oils mingle with the butter, creating a rich base. Use a silicone spatula to scrape the bottom of the pan for a clean mix.
- Stir in the brown sugar until it dissolves completely. The mixture should look slightly glossy and the sugar crystals should be invisible. This ensures a consistent sweetness throughout the bars. If the mixture looks lumpy, give it a gentle stir.
- In a separate bowl, whisk together the flour, baking soda, and salt. This dry blend ensures even distribution of leavening agents and prevents clumps. Keep the mixture dry; adding wet ingredients too early can cause uneven baking.
- Add the dry mix to the wet mixture in three portions, alternating with the vanilla extract. Stir after each addition until just combined; overmixing can make the bars tough. The batter should be thick but pourable, like a thick custard.
- Fold in ¾ of the chocolate chips, reserving the rest for topping. The chips should be evenly distributed, creating pockets of chocolate in every bite. This step is where the bars get their signature chocolatey crunch.
- Pour the batter into the prepared pan and spread it evenly with a spatula. The top should be level to ensure even baking. Place the pan in the oven and bake for 25–30 minutes, or until the edges are golden and a toothpick comes out with a few moist crumbs. Avoid overbaking to keep the bars chewy.
- Let the bars cool in the pan for 10 minutes, then transfer them onto a wire rack to cool completely. This step allows the bars to set properly, preventing them from sticking to the pan. Once cooled, cut them into squares or bars with a sharp knife for clean edges.
- Store the bars in an airtight container at room temperature for up to a week, or freeze for longer storage. The bars maintain their texture and flavor when properly sealed. When ready to eat, let them sit at room temperature for a few minutes to soften.
That’s it — you did it. But hold on, I've got a few more tricks that'll take this to another level...
Insider Tricks for Flawless Results
The Temperature Rule Nobody Follows
Temperature control is the secret weapon for consistent results. Always let the butter cool to a warm, not hot, state before mixing with peanut butter. This prevents the batter from separating and ensures a smooth, homogenous mixture. I once tried to rush the process and ended up with a lumpy batter that tasted like it had been rushed.
Why Your Nose Knows Best
The aroma of the batter is a reliable indicator of readiness. As soon as you smell the chocolate and peanut butter melding together, you know the batter is ready to go into the oven. Trust your senses; they’re usually more accurate than the clock.
The 5-Minute Rest That Changes Everything
After removing the bars from the oven, let them rest for five minutes before cutting. This brief pause allows the structure to set, preventing the bars from falling apart. It’s a small step that makes a huge difference in the final texture.
Use a Silicone Baking Mat
While parchment paper is great, a silicone baking mat adds an extra layer of non-stick protection. It also ensures even heat distribution across the pan. I’ve found that bars baked on a mat come out with a slightly crisper edge.
Keep the Chocolate Chips Cool
Store chocolate chips in a cool, dry place to prevent them from melting or blooming. If the chips are warm when you fold them in, they can create pockets of melt in the batter, leading to uneven texture. A quick chill in the fridge for 15 minutes can keep them crisp.
Creative Twists and Variations
This recipe is a playground. Here are some of my favorite ways to switch things up:
Nutty Extra
Swap half the peanut butter for almond butter for a different nut profile. The almond butter adds a subtle sweetness that pairs well with the chocolate chips. This variation is perfect for those who crave a lighter, slightly floral note.
Spicy Kick
Add a pinch of cayenne pepper or a dash of chili powder to the batter for a spicy twist. The heat contrasts beautifully with the sweetness, creating a complex flavor profile that surprises the palate. Serve with a dollop of whipped cream to balance the heat.
Sea Salt Caramel
Replace the sea salt with a fine sea salt drizzle on top after baking. The caramelized sugar on the surface gives a sweet‑salty crunch. This variation elevates the bars into a gourmet snack.
Vegan Edition
Use a plant‑based butter, a vegan peanut butter, and a flaxseed egg substitute. The bars maintain their chewy texture, while the flavor remains rich and satisfying. This version is great for those who prefer a plant‑based diet.
Dark Chocolate Delight
Replace the semi‑sweet chocolate chips with dark chocolate chips for a richer, bittersweet finish. The dark chocolate’s higher cocoa content adds depth and pairs well with the peanut butter’s natural sweetness.
Breakfast Bars
Add rolled oats and dried cranberries for a breakfast‑friendly version. The oats provide fiber, while cranberries add tartness that balances the richness. These bars can be packed in lunchboxes or taken on the go for a quick energy boost.
Storing and Bringing It Back to Life
Fridge Storage
Keep the bars in an airtight container in the refrigerator for up to two weeks. The cool temperature preserves the butter’s texture and prevents the bars from becoming stale. When you’re ready to enjoy, let them sit at room temperature for a few minutes to soften.
Freezer Friendly
Wrap each bar individually in plastic wrap and place them in a freezer bag. They can be stored for up to three months. When you want a treat, pop a bar out and let it thaw for 10 minutes. The bars stay moist and chewy after freezing.
Best Reheating Method
To revive a frozen bar, place it on a parchment‑lined baking sheet and bake at 300°F (150°C) for 8–10 minutes. The bars will regain their original texture and flavor. Add a tiny splash of water before reheating if you notice the surface has dried out.