I’m going to be brutally honest: the first time I tried to bake a mango‑coconut cake, it turned out more like a soggy pancake than a tropical masterpiece. I had imagined a light, breezy slice that would whisk you away to a beachside shack in Bali, but instead I was left with a dense, flavor‑less slab that could barely hold a frosting. That disaster sparked a relentless quest—how do you capture the bright zing of mango and the creamy whisper of coconut in a vegan cake that actually rises, looks gorgeous, and tastes like a vacation? After countless trial‑and‑error batches, I finally nailed a version that feels like a slice of paradise, and I’m convinced it’s the best you’ll ever make at home.
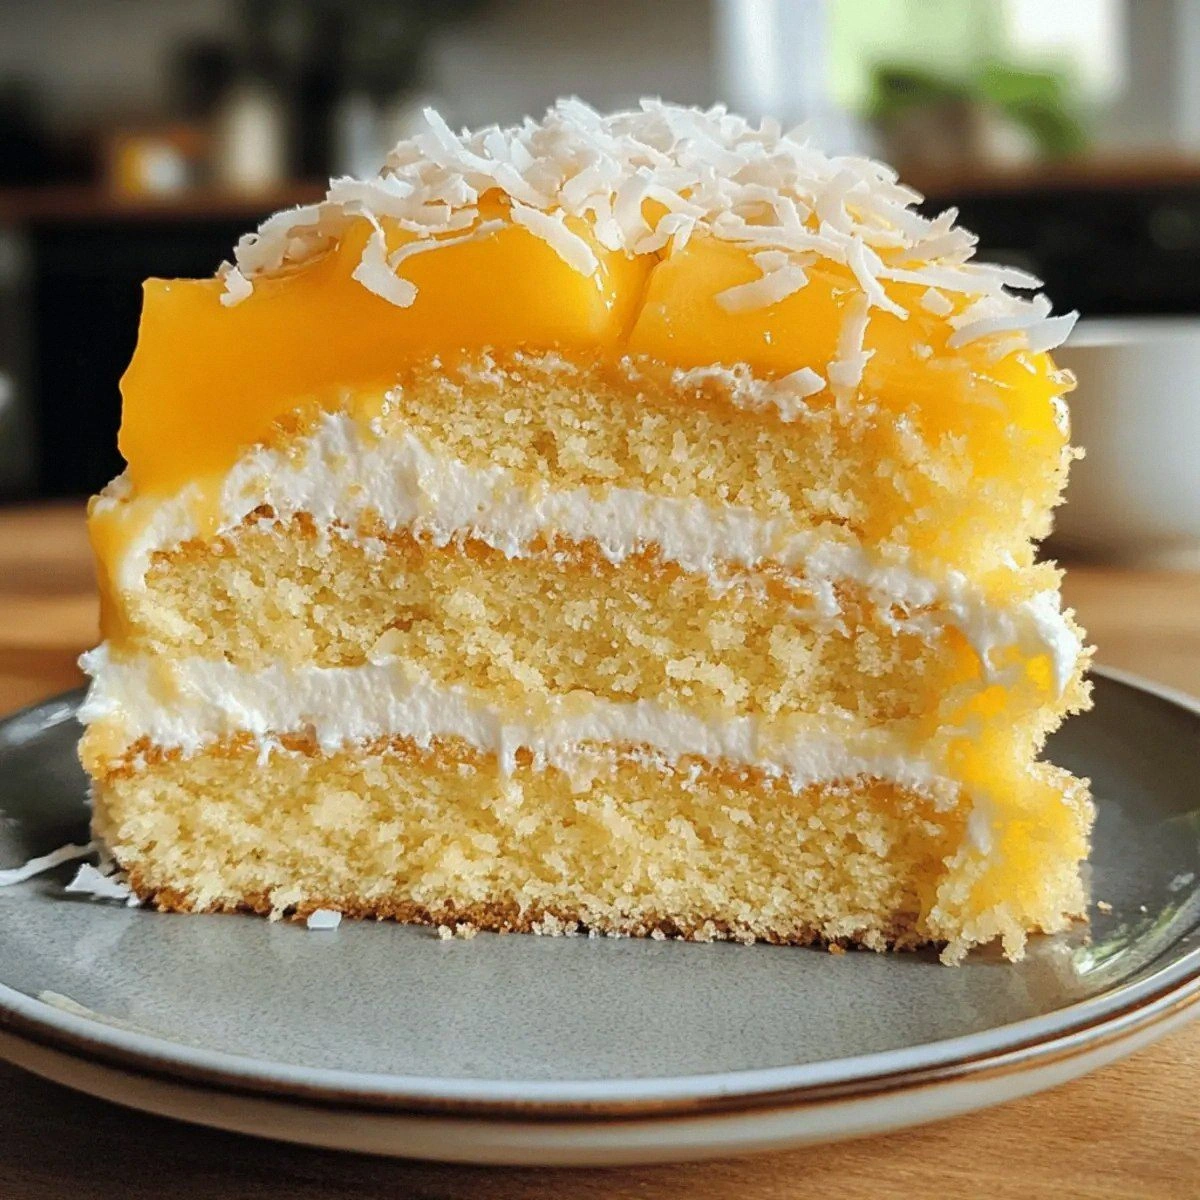
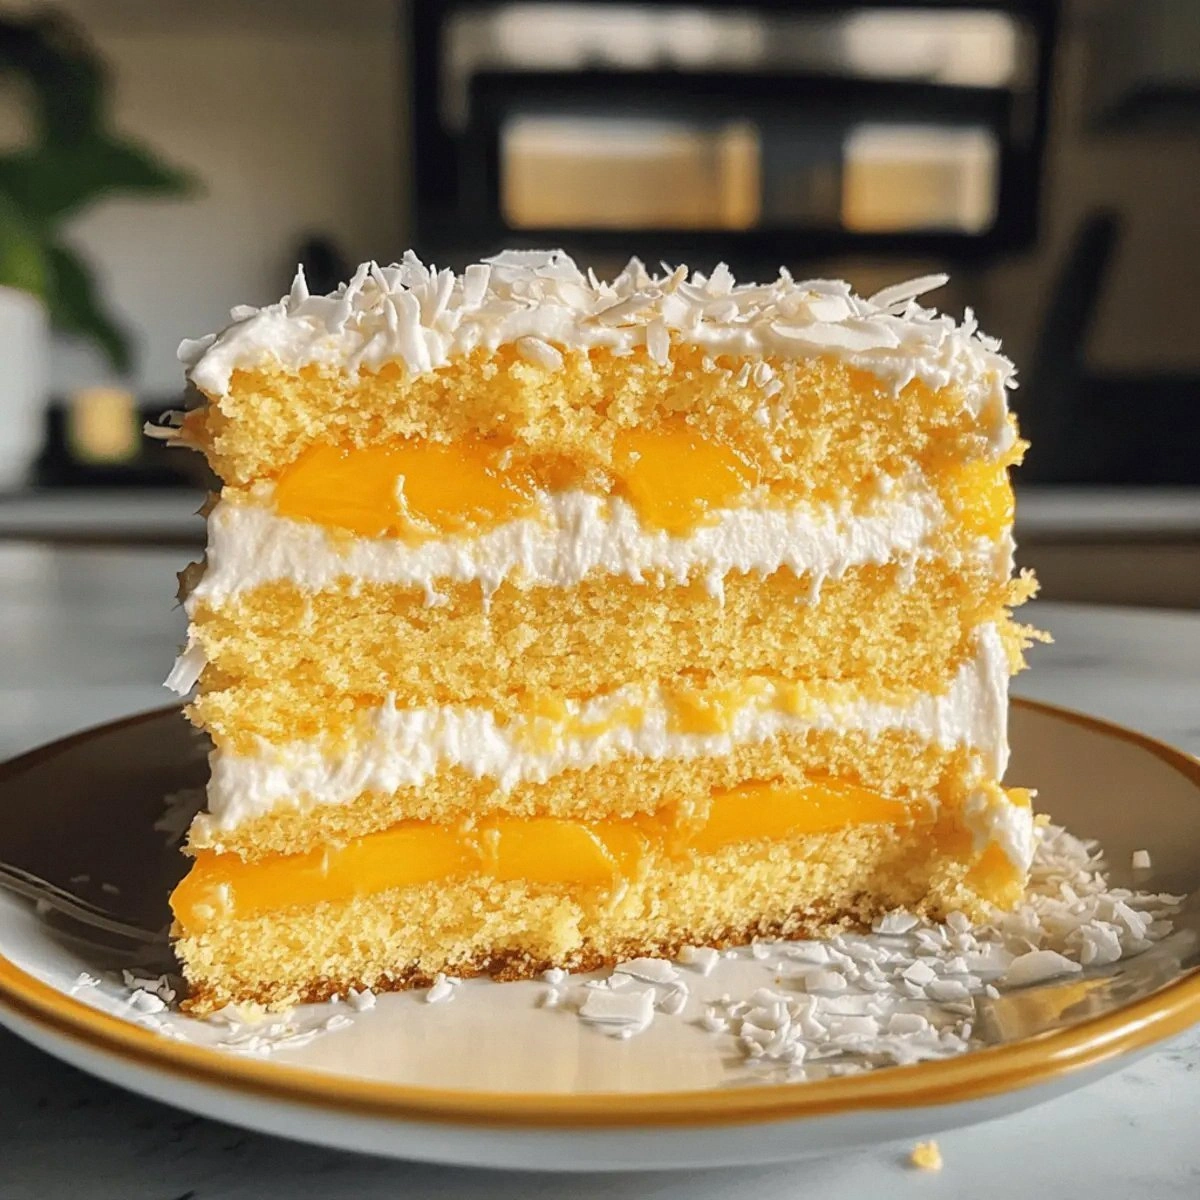
Picture this: the kitchen fills with a buttery, tropical aroma that makes your eyes water and your stomach do a happy dance. The batter is a glossy, amber‑gold swirl of mango purée and coconut‑infused butter, whispering promises of sunshine with every stir. When it hits the oven, the edges start to pull away like a sun‑kissed shoreline, while the middle stays moist and tender—just the right amount of bounce that makes each bite feel like a gentle wave. The frosting, a silky cloud of powdered sugar and extra mango purée, spreads like a sunrise over the cake’s crown, and the final garnish of toasted coconut flakes adds that satisfying crunch you crave.
What sets this version apart isn’t just the ingredients; it’s the method. Most recipes rely on dairy or eggs to create lift and richness, but I’ve swapped those out for a simple vinegar‑milk “buttermilk” that reacts with the self‑raising flour for a fluffy crumb without any animal products. The secret? A double‑purée technique that layers mango flavor—half in the batter, half in the frosting—so every mouthful delivers an explosion of fruit that’s balanced by the mellow coconut. I’ll even throw in a pro tip about using a high‑heat oven to get that perfect golden crust without drying the interior.
Okay, ready for the game‑changer? I dare you to taste this and not go back for seconds. By the end of this post, you’ll have a step‑by‑step roadmap, a handful of insider tricks, and a confidence boost that will make you the hero of any gathering. Let me walk you through every single step — by the end, you’ll wonder how you ever made it any other way.
What Makes This Version Stand Out
- Flavor Explosion: The double‑purée mango approach ensures a bright, fruity punch in both the cake and the frosting, making every bite a tropical celebration.
- Texture Harmony: A light, airy crumb meets a silky, slightly chewy frosting, thanks to the perfect balance of self‑raising flour and dairy‑free butter.
- Vegan Simplicity: No eggs, no dairy, no compromise—just pantry‑friendly staples that anyone can find at a local grocery store.
- One‑Bowl Wonder: The batter comes together in a single bowl, minimizing cleanup and keeping the process stress‑free.
- Crowd‑Pleaser: Even the most skeptical meat‑eaters admit this cake could convert them to the plant‑based side.
- Make‑Ahead Magic: The cake stays moist for days, and the frosting can be whipped up ahead of time, so you’re always ready for an impromptu dessert.
- Ingredient Quality: Using real mango purée (not concentrate) and high‑quality coconut oil elevates the flavor profile beyond the ordinary.
- Cooking Method: A high‑heat blast creates a caramelized crust while preserving a soft interior, a technique most recipes overlook.
Inside the Ingredient List
The Flavor Base
The foundation of any great cake is its liquid component. Here, dairy‑free milk (think oat or almond) provides a neutral canvas, while apple cider vinegar reacts with the milk to create a tangy “buttermilk” that tenderizes the crumb. Skipping the vinegar means you lose that subtle lift, resulting in a denser texture. If you’re out of apple cider vinegar, white wine vinegar works just as well, though the flavor will be a shade less fruity.
Mango purée is the star—half goes straight into the batter, the other half into the frosting. Fresh, ripe mangoes give a vibrant orange hue and natural sweetness that no amount of sugar can replicate. If fresh mangoes are out of season, look for frozen purée with no added sugars; just be sure to thaw it fully before using.
The Texture Crew
Self‑raising flour is the workhorse that provides structure and lift without the need for separate leavening agents. Using all‑purpose flour would require extra baking powder and could throw off the balance. For a gluten‑free twist, blend rice flour with a teaspoon of xanthan gum, but expect a slightly different crumb.
Caster sugar dissolves quickly, ensuring a smooth batter without gritty pockets. If you prefer a less sweet cake, you can cut the sugar by up to a quarter without compromising texture. Keep an eye on the sugar level—too much will make the cake overly caramelized on the edges.
Sunflower oil adds moisture and a neutral flavor that lets mango and coconut shine. Coconut oil could be an alternative for extra coconut flavor, but it solidifies at cooler temperatures, which may affect the batter’s consistency.
The Unexpected Star
Dairy‑free butter (such as a high‑fat soy or coconut blend) is the secret to that rich, buttery mouthfeel. It also helps the frosting achieve a glossy finish. If you’re on a low‑fat diet, you can substitute with a quarter‑cup of additional oil, but the frosting will be less stable.
Vanilla extract rounds out the flavor, adding depth that balances the bright mango. A splash of almond extract could add a subtle nutty note, but be careful not to overpower the tropical profile.
The Final Flourish
Powdered/icing sugar is essential for the frosting’s silkiness. It also sweetens without adding grainy texture. If you need a gluten‑free version, most powdered sugars are already gluten‑free, but double‑check the label.
Baking powder and bicarbonate of soda work together to give the cake its lift. The acid from the vinegar‑milk mixture activates the bicarbonate, while the baking powder provides additional rise. Omitting either will result in a flat, dense cake.
Everything's prepped? Good. Let's get into the real action...
The Method — Step by Step
Preheat your oven to 350°F (180°C) and position the rack in the middle. Grease a 9‑inch round cake pan with a thin layer of dairy‑free butter, then dust it lightly with flour to prevent sticking. While the oven warms, line the bottom with parchment paper for an easy release later. That sizzle when it hits the pan? Absolute perfection.
In a large mixing bowl, combine 1 cup of dairy‑free milk with 1 tablespoon of apple cider vinegar. Let it sit for 5 minutes; you’ll see it curdle into a tangy “buttermilk.” This is the secret behind the cake’s tender crumb. Watch out: If you skip this resting period, the batter will be too thin and won’t rise properly.
Add 1 cup of caster sugar, 1/2 cup of sunflower oil, and 1 tablespoon of vanilla extract to the curdled milk. Whisk until the mixture is glossy and slightly thickened. The aroma at this stage is already a promise of sweet tropical breezes.
Sift together 2 cups of self‑raising flour, 1 teaspoon of baking powder, and 1 teaspoon of bicarbonate of soda. Folding the dry ingredients into the wet mixture gently preserves the air bubbles that will give the cake its lift.
Kitchen Hack: Use a rubber spatula and a gentle “cut‑and‑fold” motion to avoid over‑mixing.Stir in 1/2 cup of mango purée until the batter turns a beautiful sunset orange. The colour should be even, with no streaks—this signals that the mango is fully incorporated. If you notice pockets of unmixed purée, give it a quick blend with an immersion blender.
Melt 1 cup of dairy‑free butter and let it cool slightly. Then, fold the melted butter into the batter, creating a glossy, rich texture that will translate into a buttery crumb. The batter should be smooth and pourable but not runny.
Pour the batter into the prepared pan, smoothing the top with a spatula. Bake for 30‑35 minutes, or until a toothpick inserted into the centre comes out clean and the edges have pulled away slightly, like a sun‑kissed shoreline. The kitchen will fill with a fragrant, caramel‑mango scent that makes you want to peek inside the oven.
While the cake cools in the pan for 10 minutes, whisk together 4 cups of powdered sugar, 1/4 cup of mango purée, and the remaining 1 cup of dairy‑free butter to create the frosting. Beat on high until the frosting is light, fluffy, and holds soft peaks—think of a cloud that could melt on your tongue.
Turn the cake onto a wire rack, peel off the parchment, and let it cool completely before frosting. This step is crucial; frosting a warm cake will cause it to slide off like a slippery banana peel. Once cool, spread the mango‑coconut frosting evenly, then sprinkle toasted coconut flakes on top for that satisfying crunch.
Slice, serve, and watch your guests’ faces light up as they bite into the tropical goodness. I dare you to taste this and not go back for seconds—if you do, you’ve officially earned the title of “Dessert Whisperer.”
Insider Tricks for Flawless Results
The Temperature Rule Nobody Follows
Never bake a cake straight from the fridge. Let the batter sit at room temperature for 10 minutes before sliding it into the oven. This small pause allows the leavening agents to activate uniformly, giving you a more even rise. I once baked a chilled batter and ended up with a dome that looked like a volcano—beautiful, but not the slice I wanted.
Why Your Nose Knows Best
The moment the cake’s edges start to pull away from the pan and you catch that faint caramel‑mango aroma is your cue that it’s almost done. Trust your nose more than the timer; ovens vary, and that scent is the ultimate reliability indicator. If you miss this cue, you risk a dry crumb, and nobody wants that.
The 5‑Minute Rest That Changes Everything
After removing the cake from the oven, let it rest in the pan for exactly five minutes before turning it out. This short rest lets the steam redistribute, preventing the cake from collapsing and keeping the crumb moist. Skipping this step is a common rookie mistake that leads to a cracked top.
Frosting Consistency Check
If your frosting feels too runny, add an extra tablespoon of powdered sugar and beat again. Conversely, if it’s too stiff, a splash of dairy‑free milk will loosen it up. The goal is a spreadable yet stable frosting that holds its shape on the cake’s surface.
The Secret Coconut Toast
Toast the coconut flakes in a dry skillet over medium heat until they turn golden and release a nutty perfume. This step adds texture and a depth of flavor that plain shredded coconut can’t match. Keep a close eye—coconut can go from toasted to burnt in seconds.
Cooling the Frosting
If you’re frosting ahead of time, store the frosting in the fridge for 20 minutes to firm up slightly. This makes it easier to pipe or spread without sliding off the cake. Bring it back to room temperature before the final coat, and give it a quick whip to restore its airy texture.
Creative Twists and Variations
This recipe is a playground. Here are some of my favorite ways to switch things up:
Coconut Lime Dream
Swap half of the mango purée for fresh lime juice and zest, and fold in toasted coconut flakes into the batter. The citrus zing cuts through the sweetness, creating a refreshing tropical punch that’s perfect for summer picnics.
Spiced Mango Delight
Add a teaspoon of ground ginger and a pinch of cardamom to the dry ingredients. The warm spices complement the mango’s brightness, turning the cake into a cozy treat for cooler evenings.
Berry‑Burst Fusion
Fold in a cup of fresh raspberries or blueberries into the batter just before baking. The berries burst during baking, leaving specks of juicy color throughout the cake, and add a subtle tart contrast.
Chocolate‑Mango Swirl
Melt ½ cup of dark vegan chocolate and drizzle it over the batter before baking, then use a skewer to create a marble effect. The bitter chocolate ribbons balance the sweet mango, offering a sophisticated flavor duo.
Nutty Crunch
Stir in ¼ cup of chopped macadamia nuts into the batter for an added buttery crunch. The nuts echo the coconut’s richness while providing a satisfying bite.
Gluten‑Free Freedom
Replace the self‑raising flour with a blend of rice flour, potato starch, and tapioca starch (2:1:1 ratio) plus an extra ½ teaspoon of baking powder. The texture will be slightly denser but still delightfully moist.
Storing and Bringing It Back to Life
Fridge Storage
Cover the cake loosely with plastic wrap or store it in an airtight container. It will stay fresh for up to 5 days. For the frosting, keep it in a separate sealed container to prevent it from absorbing any fridge odors.
Freezer Friendly
Wrap the cooled, unfrosted cake tightly in a double layer of parchment and foil, then place it in a freezer‑safe bag. It freezes beautifully for up to 2 months. When you’re ready to serve, thaw it in the fridge overnight and then bring it to room temperature before frosting.
Best Reheating Method
To revive a slice, place it on a microwave‑safe plate, sprinkle a tiny splash of water over the top, and microwave for 10‑15 seconds. The steam re‑hydrates the crumb, and the frosting softens just enough to be luscious again. Avoid microwaving for too long, or you’ll lose the delicate texture.