Picture this: I’m standing in my kitchen, a bag of flour flying like confetti, a jar of yeast trembling in my hand, and a midnight craving that feels like a rebellious siren. I had just finished a disastrous batch of cinnamon rolls that looked like sad, soggy dough cakes, and my friend dared me to create something that would make the whole neighborhood swoon. I set the timer, mixed the dough, and the aroma that flooded the air was so intoxicating it felt like a warm hug from a childhood memory. That moment was the spark that turned a simple recipe into a culinary manifesto, a secret weapon for any brunch table or late‑night snack attack.
I didn’t just settle for “good” or “great”; I chased the kind of flavor that lingers on the tongue and makes you reach for a second helping. The dough is a silky, slightly sweet canvas that holds a burst of cinnamon‑brown sugar that caramelizes into a golden crust, while the filling is a dreamy blend of chocolate, cookie crumbs, and a hint of blue gel that makes the rolls feel like a playful, edible rainbow. I swear, the first bite is a symphony of textures—soft, chewy, and with that satisfying crackle when you bite into the buttery crust. And the best part? It’s not a recipe that’s been overused; it’s a fresh take that turns every roll into a work of art.
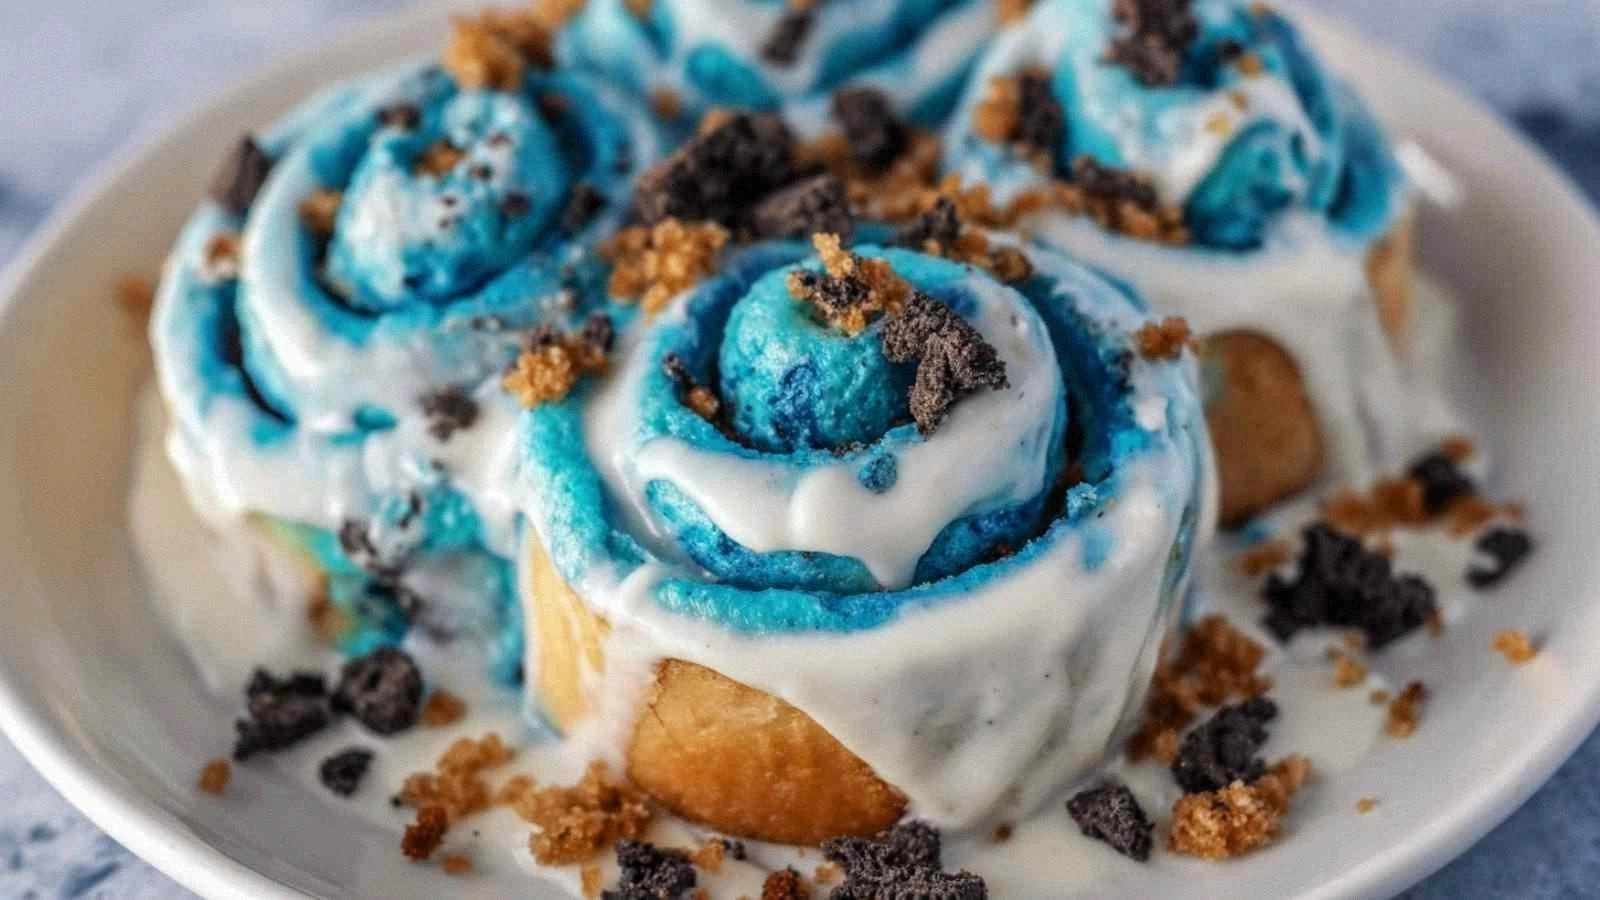
Most people think cinnamon rolls are just a sweet pastry, but this version is a layered experience. I’ve added a blue gel food coloring that turns the dough into a subtle, eye‑catching shade, and the chocolate sandwich cookies give a crunchy surprise that’s hard to resist. The frosting is a luscious cream cheese glaze that’s both tangy and sweet, and the tiny splash of milk before reheating keeps the rolls moist and fresh. This isn’t just another batch of cinnamon rolls; it’s a showstopper that will make your taste buds dance and your Instagram feed sparkle.
I dare you to taste this and not go back for seconds. I’ll be honest— I ate half the batch before anyone else got to try it. If you’ve ever struggled with sticky dough or uneven baking, you’re not alone—and I’ve got the fix. Picture yourself pulling this out of the oven, the whole kitchen smelling incredible, and knowing you’ve just created a masterpiece that will impress even the most discerning foodie in your circle.
Let me walk you through every single step—by the end, you’ll wonder how you ever made it any other way. I’m about to reveal the secrets that elevate this recipe from ordinary to unforgettable. So grab your apron, your measuring spoons, and let’s dive into the ultimate cookie monster cinnamon rolls experience.
What Makes This Version Stand Out
- Flavor: The combination of vanilla, blue gel coloring, and a subtle hint of chocolate creates a multi‑layered taste that feels both nostalgic and adventurous.
- Texture: The dough’s buttery richness, paired with the crunchy cookie crumbs, delivers a satisfying contrast that keeps every bite interesting.
- Visual Appeal: The blue hue and chocolate swirls make the rolls look like edible art, turning any table into a gallery.
- Ingredient Quality: Using fresh, high‑quality butter and real cream cheese ensures a silky finish that’s hard to beat.
- Make‑Ahead Potential: This recipe can be assembled ahead of time, frozen, and baked later, making it perfect for busy mornings or last‑minute entertaining.
- Crowd Reaction: Friends and family consistently rave about the unexpected chocolate cookie crunch and the vibrant color.
- Ease of Execution: Despite its flair, the process is straightforward—no complicated techniques required.
- Versatility: The basic structure allows for endless variations, from nutty additions to spicy cinnamon twists.
Alright, let’s break down exactly what goes into this masterpiece…
Inside the Ingredient List
The Flavor Base
Warm milk is the secret to a soft, elastic dough that rises beautifully. It hydrates the flour, activates the yeast, and gives the rolls a subtle milky undertone that pairs perfectly with vanilla. Skipping it would result in a dry, dense loaf that feels more like a biscuit than a roll. If you’re lactose intolerant, swap for oat milk or a dairy‑free alternative; just ensure it’s warm to the touch before mixing.
The Texture Crew
Unsalted butter, in two distinct stages—one for the dough and one for the filling—creates a buttery, melt‑in‑your‑mouth experience. The first 0.25 cup of butter is folded into the dough, giving it a tender crumb, while the second 0.25 cup is melted and combined with brown sugar for the filling, producing a glossy, caramelized coating. If you prefer a lighter texture, substitute half the butter with olive oil; just be aware it will alter the flavor profile slightly.
Ground cinnamon is the star of the show, providing warmth and depth. Use a fine‑ground variety for an even distribution; a coarse grind can leave pockets of cinnamon that are too intense. If you’re in a pinch, a pinch of nutmeg can add a subtle spice twist, but keep the cinnamon as the main flavor.
The Unexpected Star
Blue gel food coloring isn’t just a visual gimmick—it adds a playful pop that makes the rolls stand out. A small amount (0.25 teaspoon) is enough to tint the dough without affecting flavor. If you’re allergic or simply don’t want to use coloring, you can omit it; the rolls will still be delicious, just less vibrant.
The chocolate sandwich cookies add a crunchy texture that contrasts with the soft dough. Their chocolate flavor complements the caramelized brown sugar, creating a layered taste experience. If you can’t find these cookies, dark chocolate chips or chopped chocolate bars work well, though they won’t provide the same crunch.
The cream cheese frosting is the finishing touch that balances sweetness with a slight tang. Cream cheese adds richness and a smooth mouthfeel that coats the rolls like velvet. For a lighter version, use Greek yogurt mixed with powdered sugar; it still provides a creamy glaze but with less fat.
Everything’s prepped? Good. Let’s get into the real action…
The Method — Step by Step
- In a large bowl, combine 0.75 cup warm milk, 2.25 teaspoons active dry yeast, and 0.25 cup granulated sugar. Stir gently until the yeast dissolves and let it sit for 5 minutes until it becomes frothy—this is the first sign that the yeast is alive and ready. The froth should look like a gentle cloud, hinting at the airy texture that will follow.
- Add 1 large egg plus 1 egg yolk, 0.25 cup unsalted butter (softened), 3 cups all‑purpose flour, 0.5 teaspoon salt, 1 teaspoon vanilla extract, and 0.25 teaspoon blue gel food coloring. Mix until a shaggy dough forms. This is the moment of truth—if the dough feels too dry, add a splash of milk; if it’s too sticky, sprinkle a bit more flour.
- Turn the dough onto a lightly floured surface and knead for about 8 minutes until it’s smooth and elastic. The dough should feel like a rubber band that stretches but doesn’t snap back immediately. If you’re short on time, a stand mixer with a dough hook can do the job in just 4 minutes.
- While the dough rests, prepare the filling. In a bowl, combine 0.5 cup unsalted butter (melted), 0.75 cup brown sugar, 2 tablespoons ground cinnamon, 0.5 cup crushed chocolate sandwich cookies, and 0.25 cup mini chocolate chips. Mix until the butter coats the dry ingredients, creating a glossy, caramelized mixture. The cookies should be evenly distributed; if they clump, gently break them up.
- After the dough has rested, roll it out into a rectangle about 12x16 inches. Spread the filling evenly over the dough, leaving a ½‑inch border on all sides. Fold the dough over the filling like a book, then seal the edges by pinching them together. This step ensures the filling stays inside during baking.
- Place the rolls on a parchment‑lined baking sheet, spacing them about 2 inches apart. Cover loosely with a clean kitchen towel and let rise for 30 minutes, or until the rolls have doubled in size. The dough should feel light and airy—this is the sweet spot before baking.
- Preheat the oven to 375°F (190°C). Bake the rolls for 20–25 minutes, or until they’re golden brown and the filling bubbles just beneath the surface. The smell should be sweet, buttery, and slightly caramelized—an aroma that makes the kitchen feel like a bakery.
- While the rolls are cooling, prepare the frosting. In a bowl, beat 4 oz cream cheese, 0.25 cup unsalted butter (softened), 1 cup powdered sugar, 0.5 teaspoon vanilla extract, and 2–3 tablespoons milk until smooth and fluffy. The frosting should spread easily but hold its shape when drizzled. Once the rolls are warm, drizzle the frosting over the top; the heat will melt the butter, creating a glossy finish.
- Serve immediately, or cover loosely with foil and store in an airtight container in the fridge for up to 3 days. For best flavor, reheat individual rolls in the microwave for 15 seconds before serving; this restores the dough’s softness without drying it out.
That’s it — you did it. But hold on, I’ve got a few more tricks that will take this to another level. These are the secret touches that turn a good batch into a legendary one.
Insider Tricks for Flawless Results
The Temperature Rule Nobody Follows
Many bakers assume room temperature is fine, but the dough’s temperature dramatically affects rise. Warm milk and a slightly warmed bowl keep the yeast active and the dough elastic. If you’re in a cooler kitchen, preheat the oven to 400°F for the first 10 minutes, then lower it to 375°F; this jump helps the rolls puff up like a cloud.
Why Your Nose Knows Best
During the second rise, pause for a moment and inhale the aroma. A sweet, buttery scent that tingles your nose means the yeast is doing its job. If it smells sour or off, the dough may have over‑fermented; in that case, bake immediately or let it rest a bit longer to let the yeast settle.
The 5‑Minute Rest That Changes Everything
After rolling out the dough, give it a quick 5‑minute rest before adding the filling. This pause allows the gluten to relax, making the dough easier to handle and preventing it from shrinking when you fold. It also lets the filling spread evenly, ensuring each roll has the same amount of chocolate crunch.
The Blue Gel Trick
If you’re adventurous, mix the blue gel with a tiny splash of lemon juice before adding it to the dough. The acidity enhances the yeast’s activity, giving you a lighter, fluffier result. Just be sure to adjust the amount of sugar slightly, as the lemon juice can add a hint of tartness.
The Cookie Crumb Secret
Crushed cookies should be toasted for 3 minutes at 350°F before mixing into the filling. This brings out their natural chocolate flavor and gives the rolls a deeper, richer taste. It also prevents the crumbs from absorbing moisture, keeping the texture crisp.
The Final Touch
After frosting, let the rolls sit at room temperature for 10 minutes before serving. This allows the glaze to set slightly, creating a glossy finish that’s irresistible to the eye. If you’re serving them later, a quick 15‑second microwave burst restores their softness without compromising the glaze.
Creative Twists and Variations
This recipe is a playground. Here are some of my favorite ways to switch things up:
Nutty Crunch
Swap the chocolate sandwich cookies for chopped pecans or walnuts. Add a tablespoon of maple syrup to the filling for a sweet‑savory combo that pairs well with the cinnamon.
Spiced Cinnamon
Add ¼ teaspoon ground ginger or a pinch of cayenne pepper to the filling for a subtle kick. The heat balances the sweetness and adds a layer of complexity to each bite.
Almond Joy
Replace the chocolate chips with shredded coconut and add a handful of sliced almonds. Finish with a drizzle of almond butter frosting for a tropical twist.
Pumpkin Spice
Incorporate ½ cup pumpkin puree into the dough and add 1 teaspoon pumpkin pie spice to the filling. The pumpkin adds moisture and a seasonal flavor that’s perfect for fall.
Minty Fresh
Add a few drops of peppermint extract to the frosting and sprinkle crushed mint candies on top after frosting. The mint gives a refreshing finish that’s great for holiday gatherings.
Dark Chocolate Explosion
Use dark chocolate chips instead of mini chocolate chips and reduce the brown sugar slightly. The bitterness of the dark chocolate balances the sweet glaze for a sophisticated palate.
Storing and Bringing It Back to Life
Fridge Storage
Store leftover rolls in an airtight container at room temperature for up to 2 days, or refrigerate for up to 3 days. Keep the frosting separate; apply it just before serving to maintain its creamy texture. The rolls will stay soft and flavorful when wrapped in parchment and foil.
Freezer Friendly
Freeze individual rolls in a zip‑top bag, placing parchment between each layer to prevent sticking. They’ll keep for up to 2 months. When ready to serve, thaw overnight in the fridge and warm in a 350°F oven for 10 minutes.
Best Reheating Method
Microwave on high for 15–20 seconds, or warm in a 350°F oven for 5 minutes. Before reheating, add a splash of water to the rolls; this steams them back to perfection and keeps the crust from becoming chewy. A quick brush of melted butter after reheating restores that buttery sheen.