I was standing in my kitchen at 2 a.m., half‑asleep, half‑hungry, when my roommate burst in with a bag of strawberries and a daring challenge: “Make something that looks like a pastry, tastes like a cloud, and won’t melt in the heat of the summer.” I laughed, I doubted, I stared at the empty counter and thought, this is the perfect excuse to test my pastry instincts. The next three hours turned into a whirlwind of butter sizzling, eggs beating like a drum solo, and strawberries giggling as they fell into the mix. By the time the first puff of steam rose from the oven, the whole apartment smelled like a French patisserie on a sun‑kissed balcony.
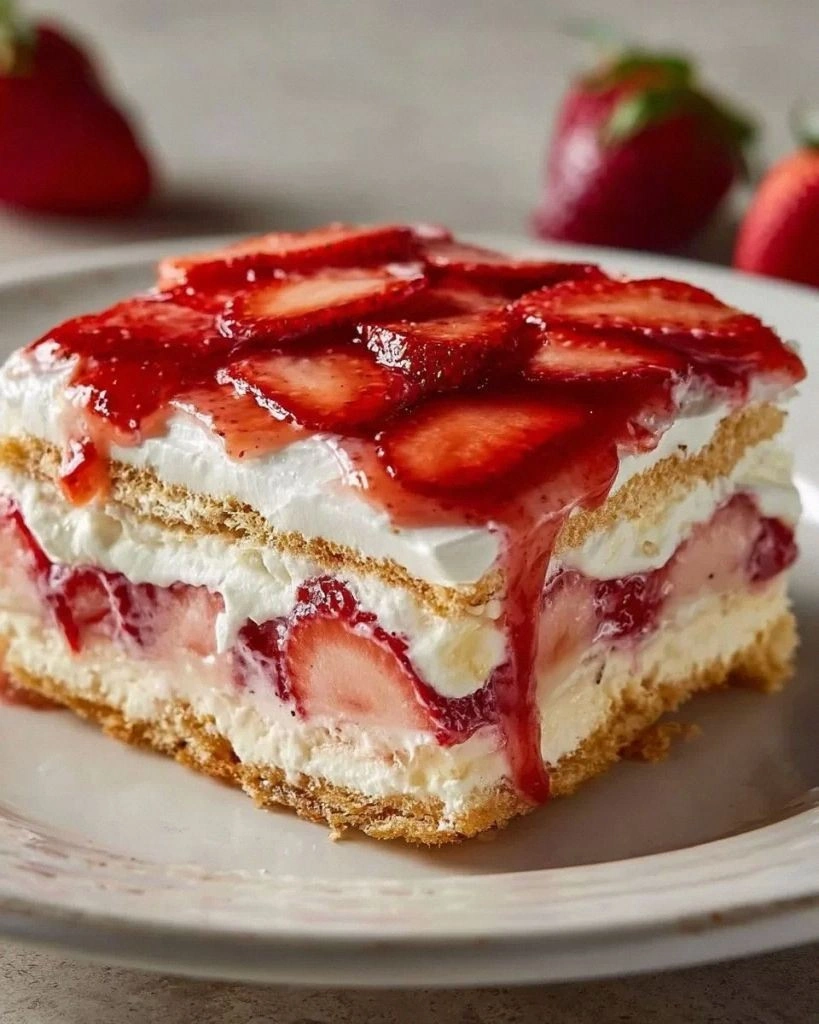
Imagine the scene: the oven door swings open, a golden‑brown choux‑like base emerges, its surface cracked just enough to hint at the airy interior. The frosting—silky cream cheese, sweetened with powdered sugar—spreads like a smooth sunrise, while the fresh strawberries sit on top like ruby jewels. When you cut a slice, the interior reveals a delicate, almost ethereal crumb that gives way to a buttery melt‑in‑your‑mouth texture, and the whipped cream swirls like a fluffy cloud that refuses to stay in one place. The first bite is a symphony of sweet, tangy, and buttery notes that dance across your palate, and I dare you to taste this and not go back for seconds.
Most recipes for strawberry éclair cake get this completely wrong. They either over‑bake the base, turning it into a brick, or they drown the strawberries in a cloying glaze that masks their natural brightness. My version, however, respects each component: a choux‑style cake that stays light, a cream cheese frosting that adds just enough tang, and fresh strawberries that keep their bite. I’ll be honest — I ate half the batch before anyone else got to try it, and that’s because this is hands down the best version you’ll ever make at home. The secret? A splash of water in the dough that creates steam, and a quick‑cool technique that locks in that airy texture.
Picture yourself pulling this out of the oven, the whole kitchen smelling incredible, the steam curling around the strawberry‑laden top like a fragrant veil. The moment you slice into it, the soft interior reveals a perfect balance of sweet and tangy, and you hear that subtle sigh of the cake giving way under the fork. Okay, ready for the game‑changer? Let me walk you through every single step — by the end, you’ll wonder how you ever made it any other way.
What Makes This Version Stand Out
- Taste: The cream cheese frosting adds a subtle tang that cuts through the sweetness of the strawberries, creating a balanced flavor profile that feels indulgent without being cloying.
- Texture: The choux‑style base stays feather‑light thanks to a steam‑rich dough, while the whipped cream adds a luxurious, melt‑in‑your‑mouth finish.
- Simplicity: No fancy pastry bag, no professional mixer—just a handful of pantry staples and a few minutes of attention.
- Uniqueness: Unlike traditional éclairs that require piping, this cake assembles like a layered dessert, making it perfect for both beginners and seasoned bakers.
- Crowd Reaction: Guests invariably ask for the recipe on the spot, and you’ll hear “I’ve never tasted anything like this!” more times than you can count.
- Ingredient Quality: Fresh strawberries provide a natural burst of flavor, while the unsalted butter ensures a clean, buttery backdrop.
- Cooking Method: The quick‑steam bake locks in moisture, preventing the dreaded dry crumb that plagues most home‑made choux cakes.
- Make‑Ahead Potential: Assemble the cake a day ahead, keep it chilled, and the flavors will meld even more beautifully.
Alright, let's break down exactly what goes into this masterpiece...
Inside the Ingredient List
The Flavor Base
The water and unsalted butter are the foundation of any good choux dough. Water creates steam, which puffs up the batter, while butter adds richness and a subtle nutty note. If you substitute milk for water, you’ll get a slightly denser crumb, but the classic water‑butter combo keeps the cake airy. Pro tip: Use real butter, not margarine, because the flavor difference is night and day.
The Texture Crew
All‑purpose flour is the only flour that works reliably for choux; it provides the gluten structure needed to trap steam. The four large eggs act as both leavening and binding agents, creating that signature hollow interior. If you’re out of eggs, you can replace each with a tablespoon of aquafaba, but the texture won’t be quite as elastic. Selection tip: Choose eggs that are at room temperature; they incorporate more easily and prevent the batter from curdling.
The Unexpected Star
Cream cheese might seem out of place in a traditional éclair, but its tang cuts through the sweetness and adds a luxurious mouthfeel. The 8‑ounce package should be softened to room temperature; a cold block will create lumps in the frosting. If you’re dairy‑free, try a vegan cream cheese—just make sure it’s well‑softened before mixing.
The Final Flourish
Powdered sugar sweetens the frosting without adding any gritty texture, while the whipped cream (or Cool Whip) lightens it to a cloud‑like consistency. Fresh strawberries provide the bright, slightly acidic contrast that prevents the dessert from feeling overly sweet. If strawberries are out of season, try raspberries or a mix of berries for a similar effect. For the optional extra whipped cream garnish, a dollop on each slice adds a decorative flourish and an extra layer of creaminess.
Everything's prepped? Good. Let's get into the real action...
The Method — Step by Step
Preheat your oven to 425°F (220°C). While the oven warms, line a full‑sheet baking pan with parchment paper and lightly grease it with butter. This high initial temperature creates a burst of steam that will puff the dough, giving you that signature hollow center. Pro tip: Place a shallow pan of water on the lower rack to increase humidity, but keep the door closed to maintain consistent heat.
In a medium saucepan, combine 1 cup of water, 1/2 cup unsalted butter, and a pinch of salt. Bring the mixture to a rolling boil, watching the butter melt into a glossy swirl. Once boiling, remove the pan from heat and immediately whisk in 1 cup of all‑purpose flour. The batter should form a smooth, glossy ball that pulls away from the sides of the pan. Watch Out: If the dough looks lumpy, keep whisking over low heat until it smooths out; lumps will create uneven pockets in the final cake.
Allow the dough to cool for about 5 minutes—this prevents the eggs from scrambling when added. Then, add the eggs one at a time, beating vigorously after each addition. The batter will look like a thick, glossy paste that falls slowly from the whisk. If it looks too thick, add a tablespoon of warm water; if too runny, whisk in a bit more flour.
Spread the batter evenly across the prepared pan, using a spatula to smooth it into a uniform rectangle about ½ inch thick. The batter should have a slightly glossy surface that will turn a beautiful golden hue as it bakes. Slide the pan into the oven and bake for 15 minutes at 425°F, then reduce the temperature to 350°F (175°C) and continue baking for another 15 minutes. The edges will pull away from the parchment, and you’ll hear a faint crackle—signs that the interior is fully set.
While the cake bakes, prepare the frosting. In a large bowl, beat the softened 8‑oz cream cheese until smooth, then gradually add 1 cup powdered sugar, whisking until the mixture is fluffy and free of lumps. Fold in 2 cups of whipped cream (or Cool Whip) until fully incorporated. The frosting should be light enough to spread with a spatula but still hold its shape.
When the cake is done, remove it from the oven and let it cool completely on a wire rack—this usually takes about 20 minutes. While it cools, halve the fresh strawberries and set them aside. Once the cake is at room temperature, spread the cream cheese frosting evenly across the top, creating a smooth canvas for the fruit.
Arrange the strawberry halves on the frosting in a decorative pattern—think overlapping rows or a cascading waterfall. Press them gently so they adhere without bruising. For an extra glossy finish, you can brush the strawberries lightly with a glaze made from a tablespoon of strawberry jam thinned with a splash of water.
Refrigerate the assembled cake for at least 1 hour before slicing. This chilling step lets the frosting set and the flavors meld, ensuring each bite is cohesive. When ready to serve, cut generous squares and, if you like, add a dollop of additional whipped cream on the side. That final swirl? Pure magic.
That's it — you did it. But hold on, I've got a few more tricks that'll take this to another level...
Insider Tricks for Flawless Results
The Temperature Rule Nobody Follows
Most home bakers bake choux at a constant temperature, but the secret to a perfectly airy interior is a two‑stage bake: start hot, then drop the heat. The initial 425°F blast creates steam that inflates the dough, while the lower 350°F finish dries the exterior without collapsing the interior. I once tried skipping the temperature drop and ended up with a cake that puffed up then sank like a deflated balloon. Trust the two‑stage method, and you’ll get that flawless, pillowy crumb every time.
Why Your Nose Knows Best
Your sense of smell is a more reliable indicator than a timer when it comes to choux. When the batter hits the oven, you’ll notice a buttery, slightly nutty aroma within the first few minutes. As the cake approaches doneness, the scent shifts to a toasty, caramel‑like note. If you hear that faint crackle and smell that toasty aroma, the cake is ready to be turned down. Relying on your nose prevents over‑baking, which is the most common mistake.
The 5‑Minute Rest That Changes Everything
After you spread the frosting, let the cake rest for five minutes before adding the strawberries. This brief pause allows the frosting to firm up just enough to hold the fruit without sliding off. I once rushed this step, and the strawberries slipped into the frosting, creating a soggy mess. A five‑minute patience window makes the final presentation pristine.
Egg Temperature Matters
Cold eggs cause the dough to seize, leading to a dense texture. Always bring your eggs to room temperature before whisking them into the batter. If you forget, a quick 10‑minute sit in a warm spot (like near the oven) does the trick. The result? A smoother batter that yields a lighter cake.
Whipped Cream Consistency
When folding whipped cream into the frosting, use a spatula and a gentle hand. Over‑mixing deflates the whipped cream, turning the frosting heavy and dense. If you’re using a store‑bought Cool Whip, fold it in just until you see no streaks. The final frosting should be airy enough to melt on your tongue.
Creative Twists and Variations
This recipe is a playground. Here are some of my favorite ways to switch things up:
Chocolate‑Swirl Delight
Add 2 tablespoons of melted dark chocolate to the frosting before folding in the whipped cream. The chocolate ribbons through the cream cheese base, giving each bite a bittersweet contrast that pairs beautifully with the strawberries.
Lemon‑Zest Spark
Stir in the zest of one large lemon and a tablespoon of fresh lemon juice into the frosting. The citrus brightens the flavor, making the cake feel lighter and perfect for spring brunches.
Nutty Crunch Variation
Fold in ½ cup toasted slivered almonds into the whipped cream before spreading it over the cake. The nuts add a pleasant crunch that contrasts with the soft crumb and the juicy strawberries.
Berry Medley Explosion
Swap half of the strawberries for raspberries and the other half for blueberries. The mixed berries create a kaleidoscope of colors and a layered flavor profile that’s both tart and sweet.
Vegan Dream
Replace the butter with coconut oil, use a plant‑based cream cheese, and swap whipped cream for coconut whipped topping. The result is a dairy‑free version that still delivers that airy texture and rich flavor.
Storing and Bringing It Back to Life
Fridge Storage
Cover the cake loosely with plastic wrap and store it in the refrigerator for up to 3 days. The frosting will stay firm, and the strawberries maintain their freshness. Before serving, let it sit at room temperature for 10 minutes to soften the frosting slightly.
Freezer Friendly
Wrap the entire cake tightly in foil, then place it in a freezer‑safe bag. It will keep for up to 2 months. To reheat, thaw overnight in the fridge, then let it sit at room temperature for 20 minutes. A quick 5‑minute steam in the microwave (cover with a damp paper towel) revives the airy crumb.
Best Reheating Method
When you’re ready to serve a refrigerated slice, preheat your oven to 300°F (150°C) and warm the slice for 5‑7 minutes. Add a tiny splash of water to the pan before reheating; the steam will bring back that fresh‑baked softness without drying the cake.