I was in the middle of a Halloween bake‑off, and the kitchen smelled like a chocolate catastrophe. The batter had turned into a sticky, unidentifiable mess, and my friends were laughing while I stared at the oven. That night, I swore I’d create something that would make the crowd gasp, not giggle. I’m talking about the ultimate mummy brownies – a dessert that’s as spooky as it is scrumptious.
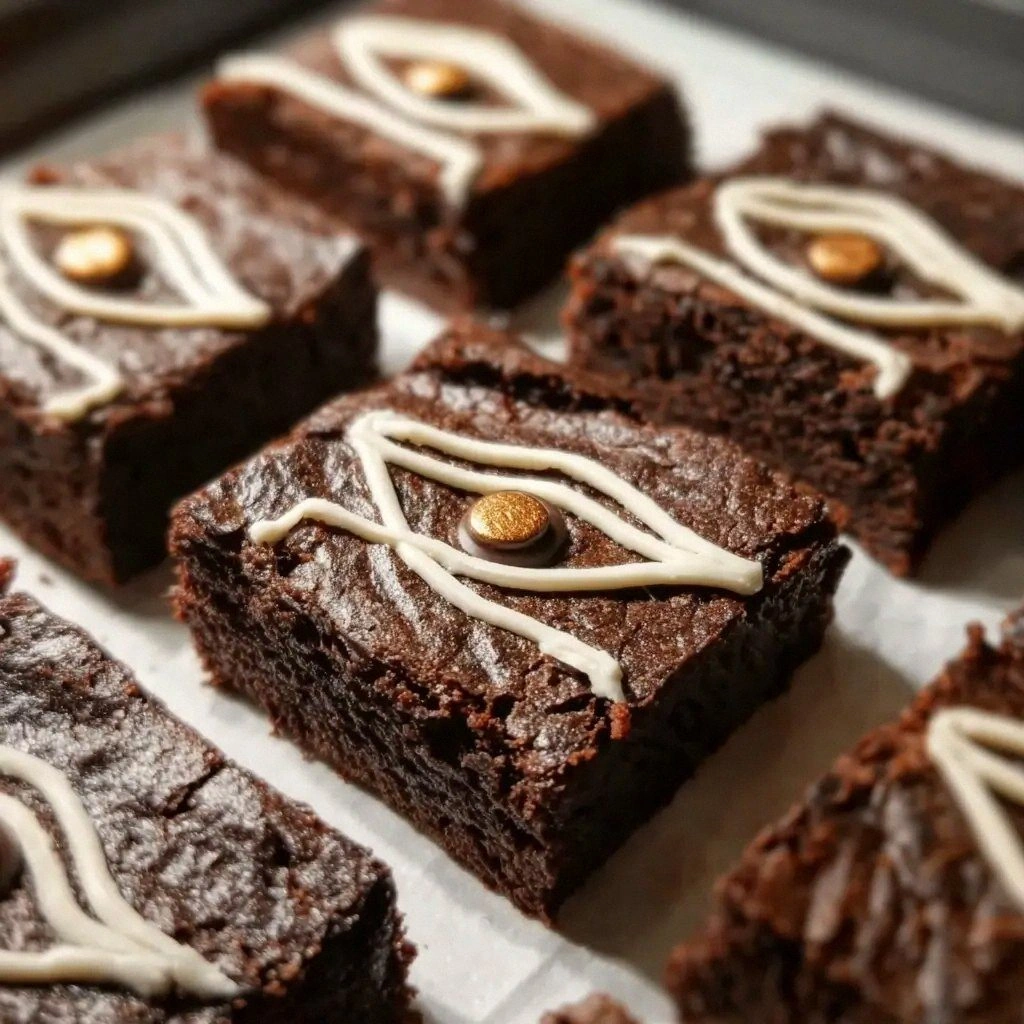
Picture this: a glossy, fudgy brownie base, wrapped in a ribbon of marshmallow or chocolate that looks like a freshly wrapped mummy, complete with a greenish “bandage” that’s actually a swirl of green food coloring. The aroma is a deep, rich chocolate that lingers like a promise, while the texture is a contrast of chewy center and crisp edges that shatter like thin ice. The first bite melts on the tongue, leaving a sweet, slightly bitter after‑taste that lingers long enough to make you crave another square.
What sets this version apart from the countless other mummy brownie posts is the precision of the batter, the subtle use of natural cocoa for depth, and the finishing touch that turns a simple brownie into a Halloween masterpiece. I’ll be honest — I ate half the batch before anyone else even got to taste it. And yet, the leftovers still look like they’re ready to haunt your pantry.
Now, let me walk you through every single step. By the end, you’ll wonder how you ever made it any other way. I dare you to taste this and not go back for seconds.
What Makes This Version Stand Out
- Flavor Depth: The dual use of natural cocoa powder and dark chocolate chips creates a layered chocolate experience that’s both sweet and slightly bitter.
- Texture Contrast: The brownie base is fudgy yet firm enough to hold the “bandage” without collapsing, while the marshmallow coating provides a chewy, melt‑in‑your‑mouth finish.
- Visual Appeal: The green swirl is a subtle nod to traditional mummy bandages, yet it adds a pop of color that makes the brownies instantly Instagram‑ready.
- Ingredient Quality: Using high‑grade butter and unsweetened cocoa ensures that no artificial flavors interfere with the natural chocolate undertones.
- Make‑Ahead Friendly: These brownies keep their freshness for up to a week in the fridge and can be frozen for longer storage.
- Crowd‑Pleaser: Whether it’s a Halloween party or a casual gathering, the novelty factor alone will have guests asking for seconds.
- Effortless Assembly: The “bandage” technique requires no special molds – just a simple rolling method that even novice bakers can master.
Alright, let’s break down exactly what goes into this masterpiece…
Inside the Ingredient List
The Flavor Base
Cocoa powder is the heart of any brownie. Using a high‑quality, unsweetened cocoa gives the brownies a rich, slightly bitter undertone that balances the sweetness of the sugar. If you skip cocoa, the brownies become more cake‑like and lose that deep chocolate resonance. For an extra punch, replace half of the cocoa with melted dark chocolate chips.
The Texture Crew
All‑purpose flour provides structure without making the brownies cakey. The butter adds moisture and a silky mouthfeel, while the eggs bind everything together and give rise to a tender crumb. If you’re gluten‑free, swap the flour for a 1:1 gluten‑free blend, but be sure to add a pinch of xanthan gum to keep the texture intact.
The Unexpected Star
Green food coloring isn’t just for Halloween; it’s a subtle way to mask the bitterness of the cocoa and add a playful twist. A tablespoon is enough to give the “bandage” a gentle, natural hue without overwhelming the chocolate flavor. If you’re allergic to dyes, a splash of spinach puree can do the trick, though it will add a hint of green.
The Final Flourish
Powdered sugar and a splash of water create a glossy glaze that simulates the look of a mummy’s wrapped bandage. The glaze also adds a sweet finish that balances the deep chocolate. If you prefer a crunchy texture, replace the glaze with melted white chocolate and sprinkle with crushed almonds.
Everything’s prepped? Good. Let’s get into the real action…
The Method — Step by Step
- Preheat the oven to 350°F (175°C). Line an 8×8 inch pan with parchment paper, leaving an overhang on the sides for easy removal. The parchment ensures a clean lift and keeps the brownies from sticking.
- In a medium bowl, whisk together 2 cups flour, 0.75 cups cocoa, 2 teaspoons baking powder, and 0.5 teaspoon salt. The dry mix should be evenly distributed; this prevents lumps and gives the batter a smooth consistency.
- In a separate large bowl, cream 1 cup softened butter with 1.5 cups sugar until light and fluffy. Use an electric mixer on medium speed for about 3 minutes; the mixture should double in volume.
- Add 4 eggs, one at a time, beating well after each addition. Then stir in 2 teaspoons vanilla extract. The batter should be thick but pourable.
- Gradually fold in the dry ingredients, mixing until just combined. Overmixing will make the brownies tough, so stop as soon as the flour disappears.
- Stir in 0.5 cup milk and 1 cup chocolate chips. The chips will create pockets of molten chocolate that add a delightful surprise.
- Pour the batter into the prepared pan and smooth the top with a spatula. The batter should be even to ensure uniform baking.
- Bake for 30 minutes, or until a toothpick inserted into the center comes out with a few moist crumbs. The edges will pull away slightly, indicating doneness.
- Let the brownies cool in the pan for 10 minutes, then lift them onto a wire rack. This prevents steam from making the bottom soggy.
- While the brownies are still warm, whisk 1 cup powdered sugar with 2 tablespoons water to make a glaze. Drizzle the glaze over the brownies, then immediately roll the edges in green food coloring to create the mummy bandage effect.
That’s it — you did it. But hold on, I’ve got a few more tricks that will take this to another level. Keep reading for insider secrets and creative twists that will make your brownies the star of any gathering.
Insider Tricks for Flawless Results
The Temperature Rule Nobody Follows
Many bakers bake at 375°F, but the perfect temperature for these brownies is 350°F. Baking at the lower heat allows the brownies to set slowly, which keeps the center fudgy and prevents the edges from becoming too hard. If you’re using a convection oven, lower the temperature by 25°F.
Why Your Nose Knows Best
Before you even touch the oven, smell the batter. A deep, chocolatey aroma indicates that the butter and cocoa are properly blended. If it smells bland, give the batter a quick stir; the aroma is your best judge of readiness.
The 5-Minute Rest That Changes Everything
After baking, let the brownies rest for exactly five minutes before cutting. This brief pause allows the internal structure to set, reducing crumbly edges and making the squares easier to slice cleanly.
The Perfect Glaze Ratio
Too much water in the glaze will make it run; too little will make it thick and hard to spread. Aim for a consistency that coats the back of a spoon. If it’s too thick, add a teaspoon of milk; if too thin, add a tablespoon of powdered sugar.
The Secret to a Clean Bandage
Roll the glaze with a clean pastry brush rather than a spoon to avoid lumps. A smooth glaze gives the mummy bandage a professional finish and ensures the green food coloring spreads evenly.
Creative Twists and Variations
This recipe is a playground. Here are some of my favorite ways to switch things up:
Nutty Mummy Brownies
Add 1 cup chopped pecans or walnuts to the batter before baking. The nuts add crunch and a buttery flavor that pairs beautifully with the chocolate.
Coffee‑Infused Mummies
Replace the milk with a shot of espresso or strong brewed coffee. The coffee deepens the chocolate flavor and gives the brownies a subtle aftertaste.
Spicy Chocolate Mummies
Stir in 1/2 teaspoon cayenne pepper or a pinch of smoked paprika into the batter. The heat adds a surprising kick that balances the sweetness.
Minty Green Mummies
Swap the green food coloring for a few drops of peppermint extract. The minty note gives a fresh twist while keeping the visual appeal.
Caramel‑Swirled Mummies
After baking, drizzle a caramel sauce over the brownies and swirl it with a toothpick. The caramel adds a gooey, buttery layer that complements the chocolate.
Vegan Mummy Brownies
Replace butter with coconut oil, eggs with flaxseed meal, and use a plant‑based chocolate chip. The result is a dairy‑free, egg‑free treat that still satisfies.
Storing and Bringing It Back to Life
Fridge Storage
Store brownies in an airtight container at room temperature for up to 5 days. The airtight seal prevents moisture loss, keeping the brownies firm and fresh.
Freezer Friendly
Wrap each brownie in plastic wrap, then place them in a freezer bag. They stay good for up to 3 months. Thaw at room temperature for 20 minutes before serving.
Best Reheating Method
To revive the brownies, heat them in a preheated 350°F oven for 5 minutes. Add a splash of water to the pan before reheating; the steam helps restore moisture and prevents the brownies from drying out.