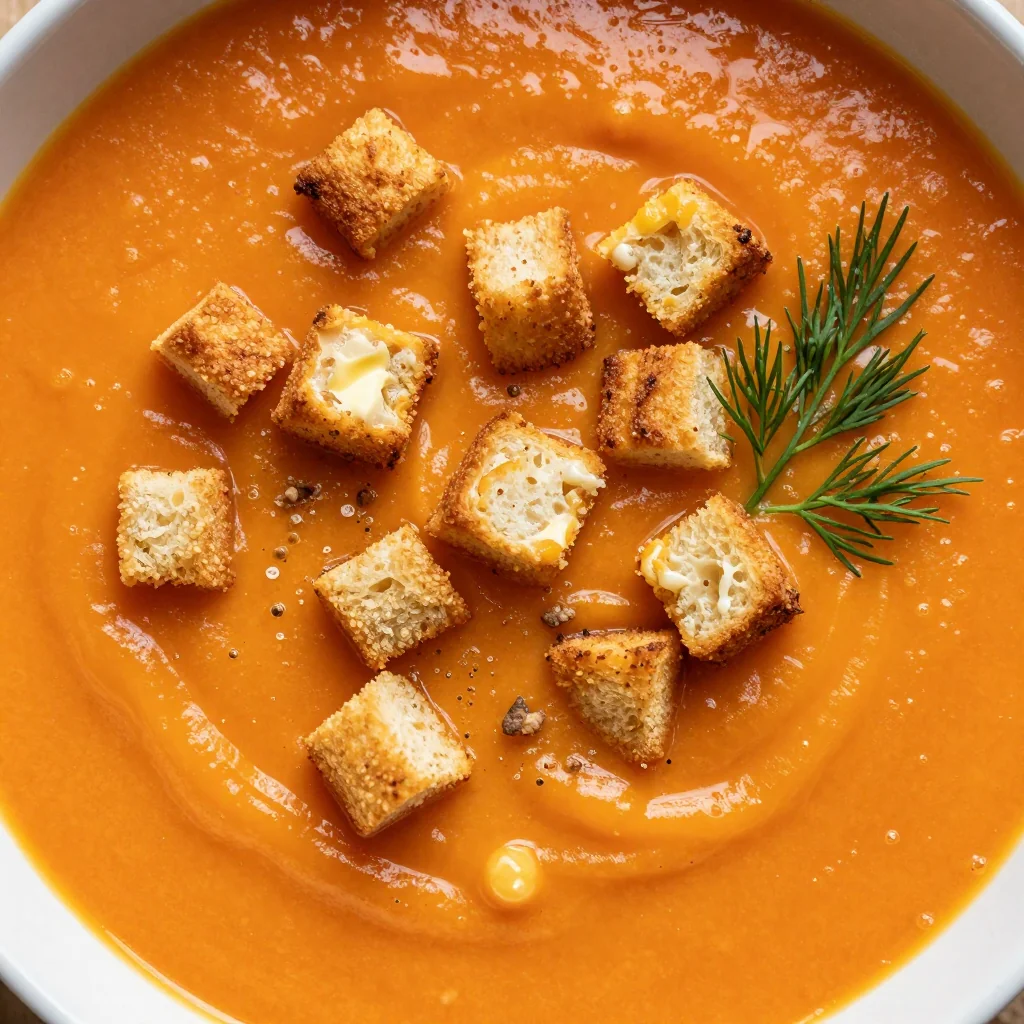
I was standing in my kitchen, half‑asleep, when the smoke alarm decided to audition for a reality TV show. The burnt toast had turned my morning into a culinary disaster, but the smell of toasted hazelnuts wafting from the pantry reminded me why I love baking. I grabbed a handful of those golden nuts, imagined a cake so moist it could drown a desert, and challenged myself: could I create a dessert that would make even the most skeptical aunt gasp in delight? I’m going to be honest — I ate half the batch before anyone else got a chance to try it, and that’s the only proof I needed that this recipe is pure magic.
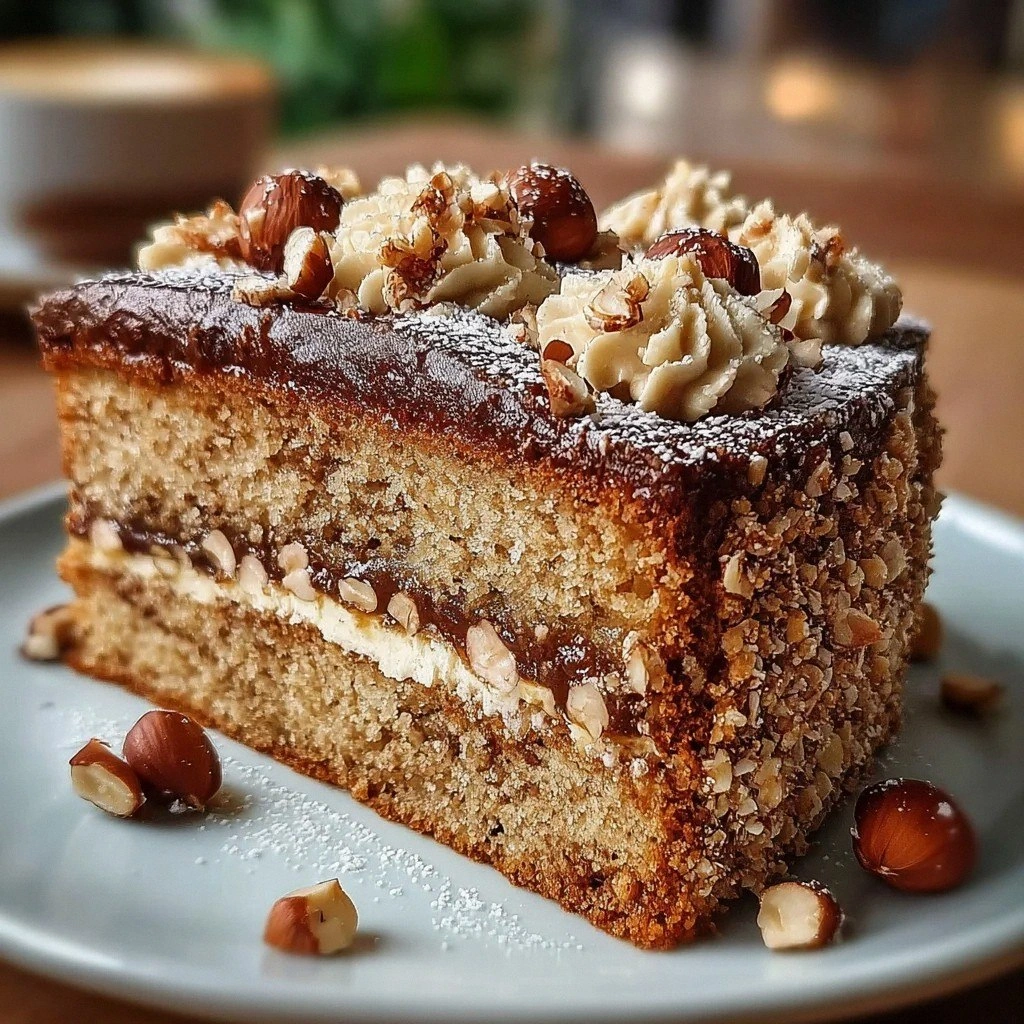
Picture yourself pulling this out of the oven, the whole kitchen smelling like a fragrant Egyptian bazaar mixed with a cozy café. The top is a golden‑brown crown, the edges pulling away just enough to reveal a tender, almost buttery interior studded with hazelnut speckles. The frosting? A silky, hazelnut‑kissed cream cheese cloud that drapes over the cake like a soft veil, while a light syrup seeps in, adding just the right amount of sweet moisture. The first bite delivers a crunch of toasted hazelnuts, a whisper of vanilla, and a lingering buttery finish that makes you want to close your eyes and sigh.
Most recipes get this completely wrong: they either drown the hazelnut flavor in sugar or leave the cake dry as a desert stone. What makes this version stand out is a secret weapon — a splash of hazelnut liqueur that lifts the nutty profile without overpowering it, and a buttermilk‑rich batter that stays tender for days. I dared you to taste this and not go back for seconds, and I’m confident you’ll accept the challenge. The technique is simple enough for a weekend warrior yet refined enough to impress a dinner party crowd.
Let me walk you through every single step — by the end, you’ll wonder how you ever made it any other way. Okay, ready for the game‑changer? This next part? Pure magic. Stay with me here — this is worth it.
What Makes This Version Stand Out
- Depth of Flavor: The hazelnut liqueur adds a subtle, aromatic lift that turns a simple nut cake into an exotic treat.
- Moisture Mastery: Buttermilk and a light syrup keep the crumb supple, preventing the dreaded dry cake syndrome.
- Texture Harmony: Finely ground hazelnuts give a gentle crunch while the cream cheese frosting provides a silky contrast.
- Simplicity Meets Sophistication: Only eleven core ingredients, yet each one plays a starring role.
- Crowd‑Pleaser Factor: Even kids love the sweet‑nutty profile, while adults appreciate the nuanced aroma.
- Ingredient Quality: Using freshly toasted hazelnuts and real butter makes the difference between ordinary and unforgettable.
- Versatile Cooking Method: The cake bakes evenly in a standard 9‑inch round pan, no fancy equipment required.
- Make‑Ahead Potential: The cake stores beautifully, and the frosting can be pre‑whipped up to a day in advance.
Inside the Ingredient List
The Flavor Base
All‑purpose flour is the backbone of the cake, providing structure and a light texture. Skipping it or substituting with a gluten‑free blend will change the crumb dramatically, often making it crumbly. I recommend sifting the flour with the leavening agents to ensure an even rise. When you buy flour, look for a brand that feels slightly powdery, not gritty; it indicates proper milling.
Baking powder and baking soda are the dynamic duo that help the cake rise, creating that lovely fluffiness. The powder releases carbon dioxide when heated, while the soda reacts with the buttermilk’s acidity for an extra lift. If you forget the soda, the cake will be dense and lack that signature airy bite. Keep them in a cool, dry place; moisture can deactivate them over time.
Salt isn’t just a seasoning; it enhances flavor and balances the sweetness. A pinch too much can make the cake taste briny, while none at all leaves it flat. Use fine sea salt for even distribution. If you’re on a low‑sodium diet, you can reduce it to ½ tsp without sacrificing taste.
The Texture Crew
Unsalted butter adds moisture and richness, making the cake melt‑in‑your‑mouth delicious. I always melt it gently and let it cool slightly before mixing, preventing curdling with the eggs. If you substitute with margarine, expect a slight off‑flavor and less buttery depth.
Granulated sugar sweetens the cake and contributes to a lovely golden color when baked. It also helps to aerate the butter when creamed together, creating tiny air pockets that expand during baking. For a deeper caramel note, you could brown the sugar lightly, but be careful not to burn it.
Large eggs bind the ingredients together and add a lovely lightness. Using room‑temperature eggs ensures they incorporate smoothly into the batter. If you replace one egg with a flaxseed “egg,” the texture will be denser and less airy.
The Unexpected Star
Buttermilk makes the cake incredibly moist and tender, with a hint of tang that cuts through the sweetness. Its acidity also reacts with the baking soda, giving the cake an extra rise. If you can’t find buttermilk, combine 1 cup milk with 1 tbsp lemon juice or white vinegar and let it sit for 5 minutes.
Finely ground hazelnuts bring that wonderful nutty flavor and a bit of crunch. Grinding them yourself ensures freshness and prevents the bitter oil from turning rancid. If you don’t have a grinder, pulse them in a food processor for a few seconds, but avoid over‑processing into a paste.
Hazelnut liqueur is optional but adds an extra layer of depth to the flavor. A splash of this spirit awakens the nutty notes without making the cake boozy. If you prefer a non‑alcoholic version, substitute with hazelnut‑flavored syrup.
The Final Flourish
Cream cheese creates a luscious, creamy frosting that pairs beautifully with hazelnuts. Its slight tang balances the sweet syrup, making each bite feel sophisticated. Use full‑fat cream cheese for the best texture; low‑fat versions become grainy.
Powdered sugar gives the frosting its sweetness and a smooth texture. Sift it before adding to avoid lumps that could ruin the frosting’s silkiness.
Hazelnut butter (such as Nutella) incorporates an irresistible hazelnut richness into the frosting. It also adds a glossy finish that makes the cake look bakery‑ready. If you’re allergic to nuts, substitute with almond butter for a different but still delightful flavor.
Heavy cream helps achieve the desired consistency for the frosting, adding creaminess without thinning it too much. Whip it just until soft peaks form before folding it into the cream cheese mixture.
More granulated sugar and water are for making the sweet hazelnut syrup that drapes lovingly over your cake. This syrup is the secret that keeps the crumb moist for days. Adjust the sugar ratio if you prefer a less sweet finish.
Roughly chopped hazelnuts are for garnish, adding a delightful crunch to each slice. Toast them lightly to enhance their aroma before sprinkling over the frosting.
Everything's prepped? Good. Let’s get into the real action…
The Method — Step by Step
Preheat your oven to 350°F (175°C) and grease a 9‑inch round cake pan with butter, then line the bottom with parchment paper. This ensures the cake releases cleanly and prevents a soggy base. While the oven warms, whisk together the flour, baking powder, baking soda, and salt in a large bowl; set aside. The mixture should look like a fine snowstorm, ready to capture air later.
In a separate mixing bowl, cream the unsalted butter and granulated sugar together until the mixture turns pale and fluffy, about 3‑4 minutes on medium speed. This is where the magic starts: the sugar crystals cut into the butter, creating tiny air pockets that will expand in the oven. Add the eggs one at a time, beating well after each addition, then stir in the vanilla extract and hazelnut liqueur if you’re using it.
Now, combine the dry ingredients with the wet mixture in three additions, alternating with the buttermilk and the 1/4 cup water. Start and end with the dry mixture. Mix just until incorporated; over‑mixing will develop gluten and make the cake tough. At this point, you should see a glossy, slightly thick batter that holds its shape when lifted.
Fold in the finely ground hazelnuts gently with a rubber spatula, distributing them evenly throughout the batter. The nuts should be visible as speckles, not clumped together. If you notice any dry pockets, add a splash of extra buttermilk, but be careful not to over‑liquefy the batter.
Pour the batter into the prepared pan, smoothing the top with an offset spatula. Tap the pan lightly on the counter three times to release any large air bubbles. The surface should be level and slightly domed; this will help the cake bake evenly.
Bake for 30‑35 minutes, or until a toothpick inserted into the center comes out clean and the edges start pulling away from the pan. Around the 20‑minute mark, rotate the pan 180 degrees to ensure uniform browning. The cake will emit a sweet, nutty aroma that signals it’s almost ready. If the top is browning too quickly, loosely cover it with aluminum foil.
While the cake cools in the pan for 10 minutes, prepare the hazelnut syrup. Combine 1/2 cup granulated sugar and 1/4 cup water in a saucepan, bring to a gentle boil, then stir in 2 tbsp hazelnut liqueur (or hazelnut‑flavored syrup) and a handful of toasted hazelnut halves. Let it simmer for 3 minutes until slightly thickened, then remove from heat.
Turn the cake onto a wire rack, then drizzle the warm syrup over the top, allowing it to soak in slowly. The cake will absorb the syrup like a sponge, guaranteeing moisture for days. Let the cake cool completely before frosting; this prevents the frosting from melting.
For the frosting, beat the cream cheese until smooth, then gradually add the powdered sugar, followed by the hazelnut butter and vanilla extract. Finally, fold in the lightly whipped heavy cream until the frosting reaches a spreadable consistency. Spread the frosting over the cooled cake, then garnish with the roughly chopped toasted hazelnuts. The final look should be glossy, with a dusting of nuts that adds visual appeal and a satisfying crunch.
That’s it — you did it. But hold on, I’ve got a few more tricks that’ll take this to another level. The cake will keep its moisture for up to three days, and the frosting can be frozen for later indulgence. Ready for the next set of insider secrets?
Insider Tricks for Flawless Results
The Temperature Rule Nobody Follows
Always bring your butter, eggs, and buttermilk to room temperature before mixing. Cold ingredients cause the butter to seize, creating pockets of unmixed fat that lead to uneven crumb. I once tried to rush the process with chilled butter and ended up with a cake that had a dense, gummy center. Letting everything sit for 30 minutes on the counter is a small time investment for a massive payoff.
Why Your Nose Knows Best
When the cake is in the oven, trust the scent more than the timer. Around the 25‑minute mark, you’ll notice a nutty, caramelized aroma that tells you the cake is nearing perfection. If you ignore this cue and overbake, the delicate hazelnut flavor will turn bitter. Keep the kitchen ventilated, but don’t open the door too often; the heat loss can cause the cake to collapse.
The 5‑Minute Rest That Changes Everything
After removing the cake from the oven, let it rest in the pan for exactly five minutes before inverting. This short rest allows the steam to settle, preventing the cake from tearing when you turn it out. A friend once skipped this step and ended up with a broken bottom that ruined the presentation. The five‑minute pause is the secret handshake between bakers and flawless cakes.
Syrup Soak Strategy
When drizzling the hazelnut syrup, do it in a slow, circular motion, letting the syrup pool at the center before spreading outward. This method ensures even moisture distribution and avoids soggy spots. If you pour too quickly, the syrup can pool at the edges and make the crust soggy. Patience here translates directly into a cake that stays moist without becoming gummy.
Frosting Temperature Tactics
If your kitchen is warm, chill the bowl and the whisk attachment for 10 minutes before whipping the frosting. Cold tools keep the cream cheese from softening too much, resulting in a firmer, more stable frosting. I once tried to frost a cake on a hot summer day and the frosting melted into a runny mess. A quick chill prevents that disaster and gives you a frosting that holds its shape even after a slice is taken.
Creative Twists and Variations
This recipe is a playground. Here are some of my favorite ways to switch things up:
Chocolate Hazelnut Delight
Swap half of the all‑purpose flour for cocoa powder and add 2 tbsp melted dark chocolate to the batter. The result is a richer, more decadent cake that pairs beautifully with the existing hazelnut frosting. Chocolate lovers will swear it’s a match made in heaven.
Citrus‑Infused Hazelnut
Add the zest of one orange and a tablespoon of orange blossom water to the batter. The citrus brightens the nutty flavor, creating a fresh, spring‑time vibe. Top with a light orange glaze for an extra pop.
Spiced Arabian Twist
Incorporate ½ tsp ground cardamom, ¼ tsp ground cinnamon, and a pinch of ground clove into the dry ingredients. These warm spices echo the historic markets of Egypt, giving the cake an exotic aroma that’s perfect for holiday gatherings.
Vegan Hazelnut Version
Replace butter with coconut oil, use a plant‑based cream cheese, and swap the eggs for a flax‑egg mixture (2 tbsp ground flaxseed + 6 tbsp water). The texture stays moist, and the flavor remains true to the original. Just be sure to use a sturdy vegan butter for the best crumb.
Gluten‑Free Adaptation
Combine a 1‑to‑1 gluten‑free flour blend with a tablespoon of almond flour for extra moisture. The almond flour adds a subtle nuttiness that complements the hazelnuts. You may need to add an extra tablespoon of buttermilk to achieve the right batter consistency.
Storing and Bringing It Back to Life
Fridge Storage
Cover the cake tightly with plastic wrap or store it in an airtight container. It will stay fresh for up to five days, with the frosting staying firm and the crumb retaining its moisture. If the frosting looks a bit stiff, let the cake sit at room temperature for 20 minutes before serving.
Freezer Friendly
Wrap the cake in a double layer of foil, then place it in a freezer‑safe bag. It freezes beautifully for up to three months. To revive, thaw overnight in the fridge, then let it sit at room temperature for 30 minutes. A tiny splash of water brushed over the top before reheating will steam it back to perfection.
Best Reheating Method
Preheat your oven to 300°F (150°C), place a slice on a baking sheet, and cover loosely with foil. Heat for 8‑10 minutes, or until warmed through. The gentle heat restores the cake’s softness without drying it out, and the frosting softens just enough to be creamy again.