It was a Tuesday that turned into a culinary fiasco when I attempted to salvage a burnt pot of lentils that had turned into a charcoal sludge. I stared at the smoldering mess, feeling a mix of disappointment and the sudden urge to turn that failure into a triumph. That night, I pulled out my Instant Pot, the trusty sidekick that has saved me from countless kitchen catastrophes, and decided to give pumpkin and chicken a shot. The aroma that followed—warm, earthy, and peppered with a hint of smoky paprika—made my mouth water and my heart race with anticipation. This is not just another pumpkin chili; it’s a symphony of flavors that will have you dancing around the kitchen and daring your friends to taste it without a second bite.
Picture this: a golden pumpkin puree swirling with diced tomatoes, the savory depth of chicken broth, and the bold punch of chili powder and cumin. The sound of the Instant Pot’s whistle is like a drumbeat, signaling that everything is coming together. As the steam rises, the kitchen fills with a scent that is both comforting and adventurous, reminding me of cozy autumn evenings and daring new adventures. The texture is a silky blend of creamy pumpkin and hearty beans, with the chicken melting into the sauce like a secret ingredient that keeps everyone coming back for more. I’ve tasted many versions of pumpkin chili, but this one has a depth that feels like a hug wrapped in spices.
Why does this version stand out? Because it balances the sweetness of pumpkin with the fiery kick of chili, all while keeping the dish moist and hearty. It’s a game-changer for the Instant Pot, a device that usually promises convenience but sometimes leaves dishes bland. I’ve tweaked the seasoning, added a splash of smoked paprika, and even tossed in a handful of fresh cilantro at the end for a burst of green freshness. The result is a dish that is both comforting and exciting, with a finish that’s creamy yet crisp. I dare you to taste this and not go back for seconds—trust me, you won’t.
If you’ve ever struggled with pumpkin chili that turns out too dry or too thick, you’re not alone. Most recipes get this completely wrong, focusing on the pumpkin alone and forgetting the balance of liquids and spices. This version uses the Instant Pot to lock in moisture, while the combination of broth, tomatoes, and beans keeps the sauce perfectly thickened. The result is a dish that’s hands down the best version you’ll ever make at home. Picture yourself pulling this out of the pot, the whole kitchen smelling incredible, and seeing that first bite of creamy pumpkin melt into the savory broth. Let me walk you through every single step—by the end, you’ll wonder how you ever made it any other way.
What Makes This Version Stand Out
- Flavor: The blend of pumpkin, tomatoes, and beans creates a complex base that feels both sweet and savory. The chili powder and smoked paprika give it a smoky depth that lingers on the palate.
- Texture: The Instant Pot locks in moisture, leaving the chicken tender and the sauce silky without becoming watery.
- Simplicity: Fewer steps, fewer pots, and a single appliance make this a breeze for busy weeknights.
- Uniqueness: Adding fresh cilantro and a dollop of sour cream at the finish gives it a bright, tangy lift that sets it apart.
- Crowd Reaction: Friends who tried it said it was “the best pumpkin chili ever,” and many asked for a recipe.
- Ingredient Quality: Using fresh chicken and canned pumpkin puree (not pumpkin pie filling) ensures the dish remains wholesome.
- Cooking Method: The Instant Pot’s pressure cooking technique reduces prep time while intensifying flavors.
- Make‑Ahead Potential: It stores well in the fridge or freezer, making it perfect for meal prep.
Alright, let's break down exactly what goes into this masterpiece…
Inside the Ingredient List
The Flavor Base
The foundation of this dish is built on the combination of canned pumpkin puree and diced tomatoes. Pumpkin puree provides natural sweetness and a creamy texture that balances the acidity of the tomatoes. Together, they create a sauce that feels both hearty and comforting. Skipping either one would leave the dish feeling thin—pumpkin would lose its sweet counterbalance, and tomatoes would lose their bright acidity. If you prefer a thicker sauce, reduce the chicken broth by a quarter cup.
For the best results, choose a pumpkin puree that’s free from added sugars or spices; it should be pure pumpkin. This keeps the flavor clean and lets the spices shine. If you’re adventurous, you can add a touch of maple syrup for extra depth, but keep it minimal to avoid overpowering the dish.
The Texture Crew
Chicken is the star of the show—boneless, skinless breasts or thighs work perfectly. The choice between breasts and thighs can affect the final texture: breasts stay lean and firm, while thighs add a richer, slightly fatty bite. Whichever you pick, cut the chicken into bite‑sized pieces to ensure even cooking. If you’re using thighs, consider browning them first for added flavor.
Black beans bring a subtle earthiness and a protein boost. They also help thicken the sauce slightly, giving it body. If you’re vegan, you can swap them for kidney beans or chickpeas, but the flavor profile will shift subtly. The beans should be drained and rinsed to reduce sodium content and avoid a metallic aftertaste.
The Unexpected Star
Fresh cilantro is the secret weapon that lifts the dish with a bright, citrusy note. It cuts through the richness of the pumpkin and the heaviness of the beans, adding a fresh finish that keeps the dish from feeling heavy. If you’re not a fan of cilantro, you can replace it with parsley or even a splash of lime juice for a tangy twist.
The final flourish comes from the shredded cheese and sour cream. They add a velvety richness that coats the chili like velvet, creating a contrast between the spicy base and the creamy top. If you’re lactose intolerant, Greek yogurt works as a great substitute for sour cream, providing tang and protein.
Everything's prepped? Good. Let's get into the real action…
The Method — Step by Step
- First, set your Instant Pot to the “Sauté” mode and add a splash of olive oil. Once the oil shimmers, toss in the chopped onion and minced garlic. Let them soften until translucent, about 3 minutes, and watch the aroma rise—this is the flavor foundation. When the onion starts to turn golden, add the chili powder, cumin, and smoked paprika, stirring until the spices coat the veggies and release their essential oils. This step is crucial for building depth; don’t skip it.
- Add the diced tomatoes and pumpkin puree to the pot, stirring to combine. The mixture should look silky and slightly thick. Next, pour in the chicken broth—this liquid is essential for pressure cooking. The broth not only provides moisture but also helps the spices meld together. Stir once more to ensure everything is evenly distributed.
- Now, lay the chicken pieces on top of the sauce. Don’t stir them in; the Instant Pot’s pressure will cook the chicken evenly without breaking it apart. Sprinkle the salt and pepper over the chicken, then add the black beans. The beans should be evenly distributed to avoid pockets of dry sauce.
- Close the lid, set the valve to “Sealing,” and choose the “Manual” or “Pressure Cook” setting on high pressure for 10 minutes. The Instant Pot will do the heavy lifting, ensuring the chicken is tender and the flavors marry. While it’s cooking, you can start prepping the cornbread, if you like, or just relax—this dish is a low‑maintenance masterpiece.
- After the 10 minutes, carefully perform a quick release by turning the valve to “Venting.” This stops the cooking process and prevents overcooking. Once the pressure has dropped, open the lid and stir the chili. The sauce should be thick, the chicken tender, and the beans well coated.
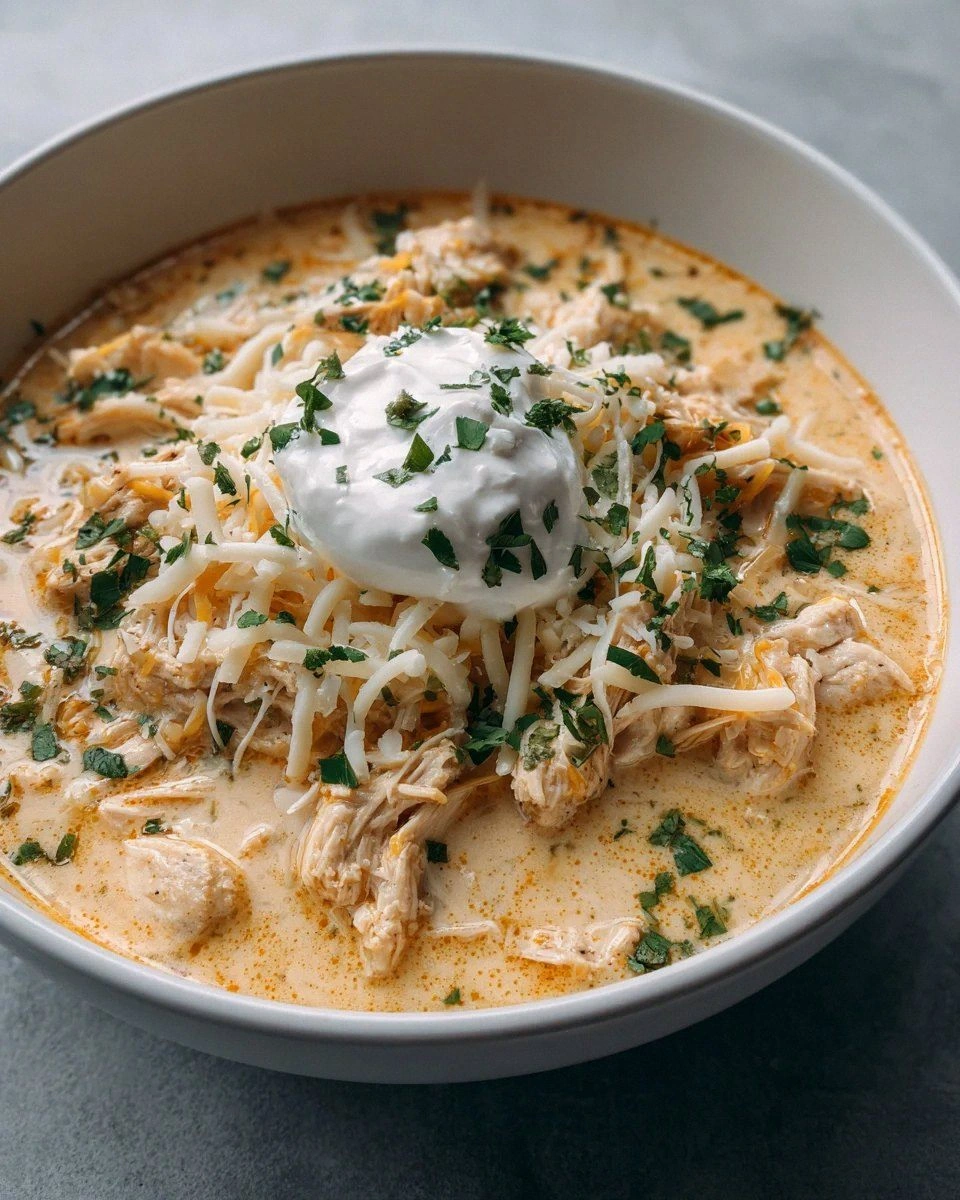
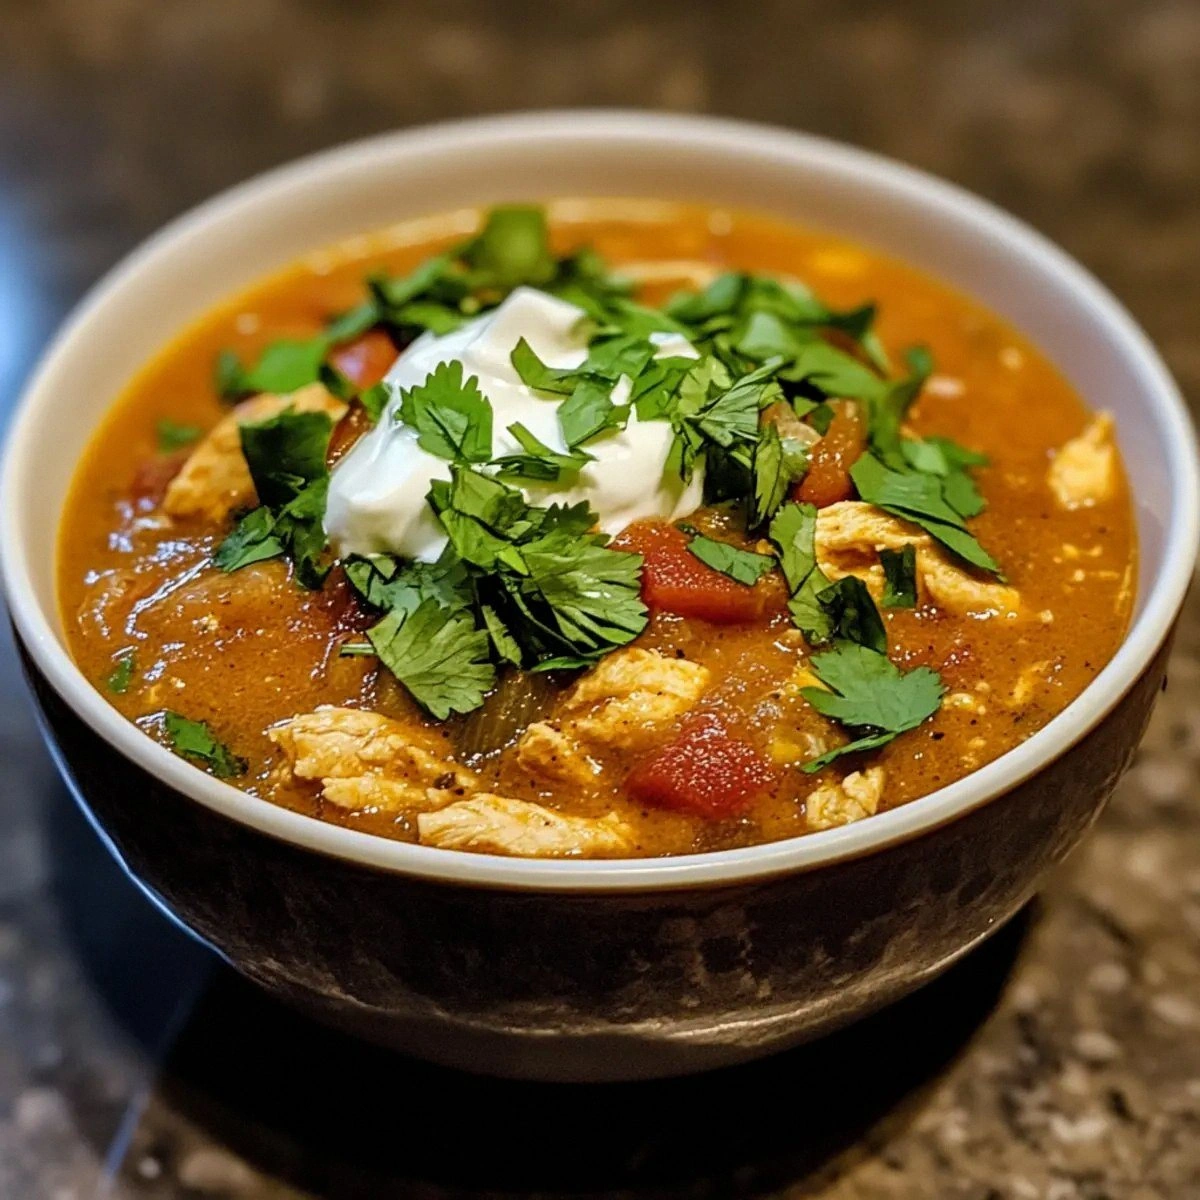
- Now it’s time for the finishing touches. Fold in the shredded cheese until it melts into a glossy, creamy layer. Add a dollop of sour cream or Greek yogurt on top of each serving for a tangy contrast. Sprinkle fresh cilantro for that bright green pop. If the sauce feels too thick, add a splash of chicken broth or water to reach your desired consistency.
- Serve the chili hot, accompanied by a warm slice of cornbread. The crumbly, buttery texture of the cornbread balances the richness of the chili, creating a satisfying bite. If you prefer a lighter option, serve it over a bed of steamed rice or quinoa. Either way, this dish is a comforting hug in a bowl.
- That’s it—you did it. But hold on, I’ve got a few more tricks that’ll take this to another level. Keep reading for insider tips that will elevate the flavor profile and presentation.
Insider Tricks for Flawless Results
The Temperature Rule Nobody Follows
Many people think that once the Instant Pot hits high pressure, the temperature is fixed. In reality, the internal temperature can vary based on the amount of liquid and the density of the ingredients. Keep the lid slightly ajar if you’re worried about over‑cooking the beans—this allows a gentle simmer that keeps them fluffy. If you’re experimenting with different proteins, adjust the cooking time accordingly: thighs need a minute more than breasts.
Why Your Nose Knows Best
When the chili is halfway done, pause and sniff the steam. A hint of smoky aroma indicates that the spices are fully released. If the smell is muted, let it cook for an extra minute or add a pinch more paprika. Your nose is the best judge of depth; trust it over the clock.
The 5-Minute Rest That Changes Everything
After releasing pressure, let the chili sit for 5 minutes before serving. This rest period allows the flavors to settle and the sauce to thicken slightly, giving it a silky mouthfeel. During this time, you can top the chili with extra cheese or a squeeze of lime for a fresh kick.
The Cheese Melt Trick
If you’re adding cheese, sprinkle it on top of the hot chili and let it melt for a minute before stirring. This creates a creamy layer that clings to each bite, making the dish feel indulgent without being greasy. If you’re a fan of a crunchy texture, reserve a handful of cheese for topping only.
The Cilantro Timing
Adding cilantro too early can cause it to wilt and lose its bright flavor. Add it right before serving or as a garnish to preserve its fresh, citrusy notes. If you’re serving the chili cold, keep the cilantro on the side until the last minute.
The Quick Broil Finish
For an extra touch of elegance, transfer the chili to a broiler-safe dish, sprinkle a final layer of cheese, and broil for 1–2 minutes. The cheese will form a golden crust that adds both texture and visual appeal. Watch closely—once it starts bubbling, it’s ready.
Creative Twists and Variations
This recipe is a playground. Here are some of my favorite ways to switch things up:
Spicy Jalapeño Kick
Dice a fresh jalapeño and sauté it with the onions. The heat pairs beautifully with the smoky spices, creating a bold, fiery version that’s perfect for heat lovers.
Sweet Maple Glaze
Stir in a tablespoon of pure maple syrup after pressure release. The subtle sweetness balances the spices and adds a caramelized note, reminiscent of fall desserts.
Vegan Powerhouse
Swap the chicken for diced tofu or tempeh, and use vegetable broth. Keep the rest of the ingredients the same, and you’ll have a hearty, plant‑based chili that still feels indulgent.
Mexican Street Tacos
Serve the chili over warm corn tortillas, topped with diced avocado, fresh cilantro, and a squeeze of lime. The tacos transform the dish into a street‑food experience.
Coconut Curry Twist
Replace half of the chicken broth with coconut milk, and add a pinch of curry powder. This version offers a creamy, tropical flavor profile that’s a delightful departure from the classic.
Cheese Lover’s Dream
Add shredded cheddar or Monterey Jack before the final cheese melt. The extra cheese layers the dish with gooey richness, turning it into a comfort food staple.
Storing and Bringing It Back to Life
Fridge Storage
Cool the chili to room temperature, then transfer it to an airtight container. Store in the refrigerator for up to 4 days. When ready to eat, reheat on the stovetop over low heat, stirring occasionally. The sauce should be heated through, and the cheese should remain creamy.
Freezer Friendly
For longer storage, portion the chili into freezer-safe containers or zip‑lock bags. Freeze for up to 3 months. Thaw overnight in the refrigerator before reheating. Add a splash of water or broth if the sauce has thickened during freezing.
Best Reheating Method
The best way to revive this dish is on a low‑heat stovetop, stirring gently. If it’s too thick, add a tablespoon of water or broth at a time until you reach the desired consistency. Finish with a dollop of sour cream or a sprinkle of cheese for that fresh finish.