Picture this: I’m standing in my tiny kitchen, the clock ticking louder than my nerves, and a sudden, almost criminal craving for something that feels like a candy bar and a dessert had a love child. I dared my roommate to a midnight snack showdown, and she bet me I couldn’t turn a bag of Butterfinger bars into a pie that would make the entire block drool. Spoiler alert—I not only won the bet, I created a dessert that has since become the unofficial anthem of every movie night in my apartment. This isn’t just a recipe; it’s a full‑blown culinary rebellion against boring pies.
The moment I cracked open that first Butterfinger, the salty‑sweet aroma hit me like a nostalgic high‑five from my childhood. The crunchy peanut butter core, the buttery toffee coating, and that unmistakable chocolate snap—each bite was a fireworks display for my taste buds. I could hear the faint hum of the refrigerator, the clink of the mixing bowl, and the soft sigh of the oven preheating, all while the scent of toasted graham crust began to weave itself into the background like a warm blanket. My hands were tingling, the kitchen felt alive, and I could almost taste the creamy, peanut‑buttery swirl already forming in my mind.
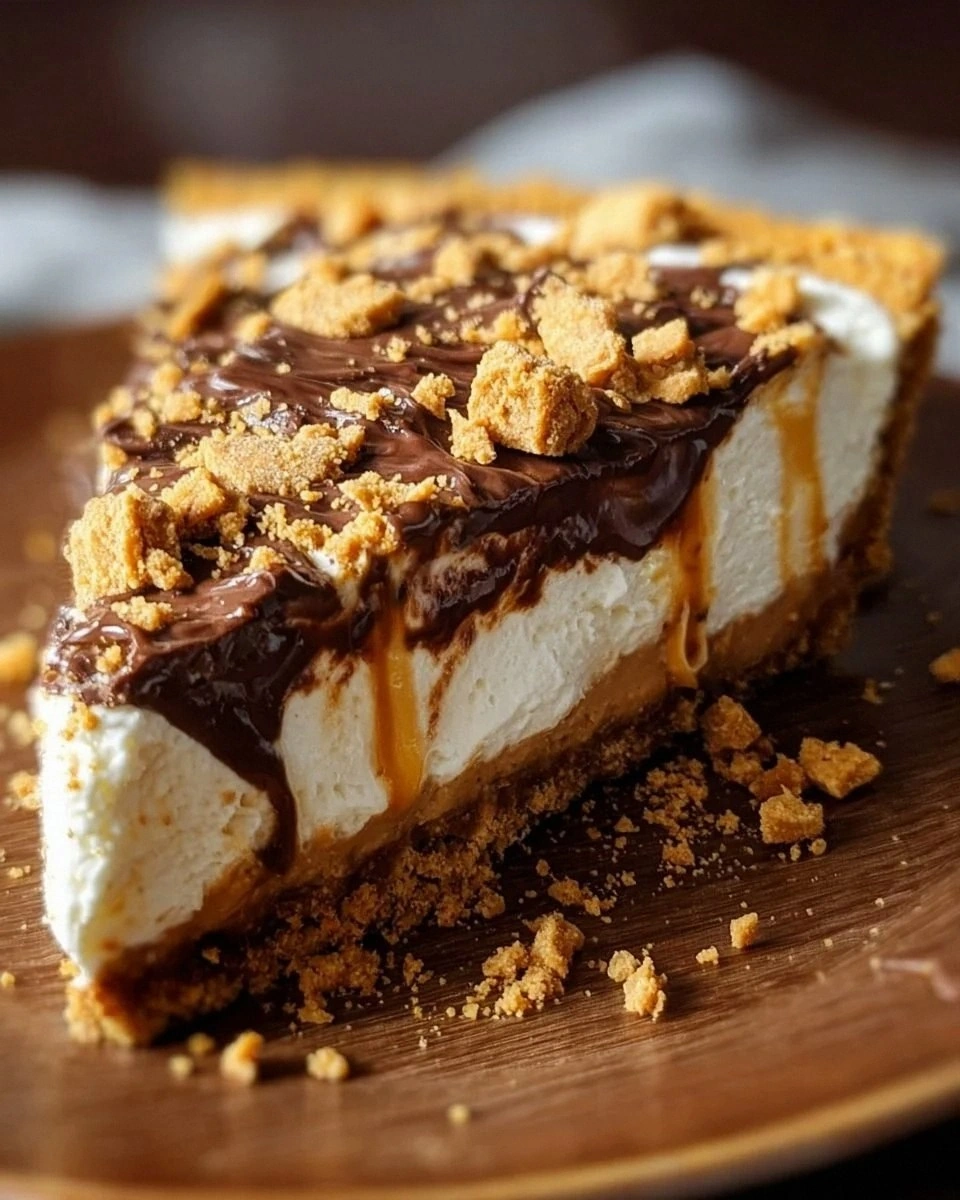
Most Butterfinger pie attempts I’ve seen either drown the candy in a sea of sugary frosting or skip the crucial crunchy texture that makes the bar so iconic. I’ve tried versions that left the crust soggy, others that turned the filling into a bland, overly sweet custard that forgot the star of the show—Butterfinger itself. This version, however, is hands down the best you’ll ever make at home because it respects every layer: a crisp graham base, a silky peanut‑butter cream, and a generous, crunchy topping that shatters like thin ice under a spoon. I’m about to spill the secret that most recipes miss: the simple trick of folding the whipped topping at just the right moment to keep the filling airy yet sturdy enough to hold those glorious candy shards.
Let me walk you through every single step — by the end, you’ll wonder how you ever made it any other way. I dare you to taste this and not go back for seconds. Ready? Okay, ready for the game‑changer? Let’s dive in.
What Makes This Version Stand Out
- Flavor Explosion: The marriage of creamy peanut butter, tangy cream cheese, and the unmistakable Butterfinger crunch creates a taste that’s both nostalgic and brand‑new, like a favorite song remixed with a fresh beat.
- Texture Symphony: You get a buttery graham crust, a velvety filling, and a crunchy topping that shatters with each bite—no soggy bottoms here.
- Simplicity Meets Sophistication: Only six ingredients, all store‑bought, yet the result feels like it took hours of professional pastry work.
- Universal Appeal: Kids love the candy, adults appreciate the creamy depth, and even the picky eaters can’t resist the sweet‑salty balance.
- Ingredient Quality: Using real Butterfinger bars (not the imitation) and a high‑quality whipped topping makes the difference between “good” and “legendary.”
- Make‑Ahead Magic: The pie can chill in the fridge for up to 24 hours, allowing the flavors to meld and the crust to set perfectly.
- Show‑Stopper Presentation: The glossy, caramelized top and the vibrant candy pieces make it Instagram‑ready without any extra effort.
- Confidence Booster: This pie will have you bragging to friends, because let’s face it—who can resist a dessert that’s both familiar and daring?
Inside the Ingredient List
The Flavor Base
Cream Cheese (1 package, 8 oz, softened): This is the backbone of the filling, providing that tangy richness that balances the sweetness of the candy. If you skip it, the pie becomes a one‑note dessert, lacking the subtle acidity that cuts through the peanut butter. A good tip: let it sit at room temperature for 20 minutes; it will blend effortlessly without lumps.
Creamy Peanut Butter (1 cup): The star of the show, delivering that deep, nutty flavor that makes every bite feel like a nostalgic candy bar. Using a natural peanut butter will give you a slightly grainier texture but a more authentic taste; stick with the classic creamy version for a silkier finish. If you’re allergic, almond butter can work, though the flavor profile shifts dramatically.
The Sweetening Crew
Powdered Sugar (1 cup): It sweetens the filling without adding any gritty texture, dissolving perfectly into the cream cheese and peanut butter blend. Skipping it or using granulated sugar will leave you with a gritty mouthfeel that ruins the smoothness. For a lower‑sugar version, you can reduce to ¾ cup, but expect a less sweet finish.
Whipped Topping (1 cup, like Cool Whip): This adds airy lightness, making the filling feel like a cloud that’s been infused with candy. Be sure to use a brand that stays stable in the fridge; some “light” versions collapse after a few hours. If you’re feeling adventurous, fold in a splash of heavy cream for extra richness.
The Unexpected Star
Butterfinger Candy Bars (3 bars, crushed): These are the game‑changer, providing that crunchy, caramel‑peanut butter core that makes the pie unforgettable. Crumble them just before folding into the filling to keep the pieces from melting into a mushy mess. If you can’t find Butterfinger, try a mix of peanut butter cups and toffee bits for a similar texture.
The Final Flourish
Pre‑made Graham Cracker Crust (9‑inch): The crust acts as a sturdy foundation, offering a buttery, slightly sweet contrast to the rich filling. A homemade crust would be amazing, but the pre‑made version saves time and still delivers that perfect crunch. Make sure the crust is chilled before adding the filling; a warm crust can become soggy.
Everything's prepped? Good. Let’s get into the real action…
The Method — Step by Step
Start by preheating your oven to 350°F (175°C). While the oven warms, place the graham cracker crust on a sturdy baking sheet; this will prevent any wobble when you later add the filling. Feel the crust under your fingers—it should be firm but not brittle, a perfect canvas for the upcoming layers. This is the moment of truth: a solid base means a flawless final product.
In a large mixing bowl, combine the softened cream cheese and powdered sugar. Use a handheld mixer on medium speed until the mixture is smooth, glossy, and free of lumps—think of it as a silky frosting that could double as a frosting for cupcakes. Scrape the sides frequently; you’ll hear a faint hum from the mixer that’s almost musical. Watch Out: Over‑mixing can incorporate too much air, making the filling too light and prone to collapsing after chilling.
Now, add the creamy peanut butter to the bowl. As you blend, you’ll notice the mixture darkening to a rich, caramel‑brown hue—this is the flavor foundation solidifying. Keep mixing until the peanut butter is fully incorporated; the texture should be thick yet spreadable, like a decadent chocolate ganache. This next part? Pure magic.
Gently fold in the whipped topping using a rubber spatula. The key is to preserve the air bubbles, so use a gentle folding motion—cut, lift, and turn over, rather than stirring vigorously. The mixture will lighten dramatically, turning from a dense paste into a cloud‑like mousse that practically begs to be spooned.
Kitchen Hack: If the whipped topping starts to melt, chill the mixing bowl for 10 minutes before continuing.Take the three Butterfinger bars and crush them into roughly one‑inch pieces. You want a mix of small crumbs and larger chunks for texture contrast. Sprinkle half of the crushed candy into the filling and gently fold, ensuring you don’t over‑mix and lose the crunch. The remaining candy will be reserved for the topping, giving the final bite that satisfying snap.
Pour the filling into the pre‑made graham crust, spreading it evenly with a spatula. Use the back of a spoon to smooth the surface, creating a flawless plane that will showcase the candy topping. As you spread, you’ll hear a faint sigh as the filling settles—listen for that; it means the mixture is well‑distributed.
Now, scatter the remaining crushed Butterfinger pieces over the top, pressing lightly so they adhere to the filling. For an extra glossy finish, you can drizzle a thin layer of melted chocolate, but that’s optional. The candy should sit like glitter on a cake—bright, bold, and impossible to ignore.
Watch Out: If you use too much chocolate drizzle, it can mask the Butterfinger flavor, so keep it light.Slide the pie into the preheated oven for 12‑15 minutes. You’re not baking the filling—just giving it a gentle set and a slight golden edge on the crust. Keep an eye on the edges; they should start pulling away from the pan and turn a light amber. The scent that fills the kitchen at this stage? Absolute perfection, a blend of toasted graham, peanut butter, and caramel.
Remove the pie and let it cool on a wire rack for 10 minutes, then transfer it to the refrigerator for at least 2 hours. This chilling step is crucial—it lets the filling firm up, making slicing clean and beautiful. While it chills, you can prepare a garnish of extra Butterfinger shards for a dramatic finish right before serving. And now the fun part: slicing!
When you’re ready, run a hot knife through the pie to get neat slices. Serve each piece with a dollop of extra whipped topping if you like, and watch as your guests’ eyes widen with anticipation. That first bite? It’s a cascade of creamy, crunchy, sweet, and salty sensations that will have everyone shouting for seconds. I’ll be honest—I ate half the batch before anyone else got to try it.
That's it — you did it. But hold on, I've got a few more tricks that'll take this to another level…
Insider Tricks for Flawless Results
The Temperature Rule Nobody Follows
Never pour a cold filling into a warm crust. The temperature shock can cause the crust to soften and become soggy. I once tried this shortcut and ended up with a pie that fell apart at the first slice. Keep the filling at room temperature, or gently warm it for a minute, then chill quickly.
Why Your Nose Knows Best
When the crust is baking, trust your nose more than the timer. You’ll smell a buttery, toasted aroma that signals the perfect golden edge. If you miss this cue, the crust can over‑brown, turning bitter. So stay close, inhale deeply, and pull the pie out at the sweet spot.
The 5‑Minute Rest That Changes Everything
After the pie comes out of the oven, let it rest for exactly five minutes before refrigerating. This short pause allows the filling to set just enough to hold its shape without becoming too firm. Skipping this step leads to a runny center that slides off the plate.
Crush, Don’t Powder
When handling Butterfinger bars, aim for chunky pieces, not a fine powder. The larger shards give you that satisfying crunch, while a powder can melt into the filling and lose texture. I once over‑processed the candy and the pie turned into a smooth, candy‑flavored mousse—nice, but not the intended experience.
Whipped Topping Rescue
If your whipped topping starts to separate, whisk in a teaspoon of powdered sugar and a splash of vanilla extract. This stabilizes the mixture and brings back its fluffy consistency. It’s a quick fix that saves the day and keeps the filling airy.
Creative Twists and Variations
This recipe is a playground. Here are some of my favorite ways to switch things up:
Chocolate‑Swirl Delight
Swirl in a quarter cup of melted dark chocolate into the filling before folding in the whipped topping. The chocolate adds depth and a bittersweet contrast to the candy’s sweetness. Perfect for those who love a mocha‑like finish.
Salted Caramel Crunch
Drizzle a homemade salted caramel sauce over the top before adding the final Butterfinger shards. The salty caramel amplifies the candy’s buttery notes and adds a silky sheen. It’s a luxurious upgrade for special occasions.
Nutty Nutmeg
Mix a tablespoon of finely chopped toasted almonds into the filling for an extra layer of nutty crunch. The subtle nutmeg aroma from the almonds pairs beautifully with the peanut butter. Great for autumn gatherings.
Mini Pie Bites
Use a muffin tin and pre‑made mini graham crusts to create bite‑size versions. These are perfect for parties, allowing guests to sample without committing to a full slice. The baking time drops to 8‑10 minutes.
Vegan Version
Swap the cream cheese for a vegan cream cheese alternative, use a plant‑based whipped topping, and choose a dairy‑free graham crust. The flavor profile remains largely the same, proving you don’t need dairy to enjoy decadence.
Spicy Kick
Add a pinch of cayenne pepper to the filling for a subtle heat that surprises the palate. The spice accentuates the chocolate and peanut butter, creating a sophisticated flavor dance. Use sparingly—just enough to intrigue, not overwhelm.
Storing and Bringing It Back to Life
Fridge Storage
Cover the pie loosely with plastic wrap and store it in the refrigerator for up to 3 days. The whipped topping will stay firm, and the crust will retain its crunch. For best texture, bring the pie to room temperature for 15 minutes before serving.
Freezer Friendly
Wrap the pie tightly in foil, then place it in a freezer‑safe bag. It will keep for up to 2 months. When you’re ready to enjoy, thaw it in the refrigerator overnight, then let it sit at room temperature for 20 minutes. This method preserves the flavor and prevents freezer burn.
Best Reheating Method
To revive the crust’s crispness, preheat your oven to 300°F (150°C) and warm the pie for 8‑10 minutes. Add a tiny splash of water (about a tablespoon) to the crust before reheating; the steam will re‑moisturize the edges without making the filling soggy. Slice and serve immediately for that fresh‑out‑of‑the‑oven feel.